I always think of spring when I see a paper butterfly drifting across a table. Making Whimsical Spring Butterfly Paper Crafts became a way for me to slow down on rainy afternoons, listening to the soft crinkle of tissue and the faint whiff of ink from old magazines.
Those simple moments turned into tiny rituals of play and curiosity.
Over time I gathered favorite techniques, from delicate vellum wings to bouncy accordion folds. Whimsical Spring Butterfly Paper Crafts kept showing up as cheerful accents around the house, each one different in texture, color, and the small surprise it brought when light hit its wings.
Tissue paper butterflies with crinkly wing textures
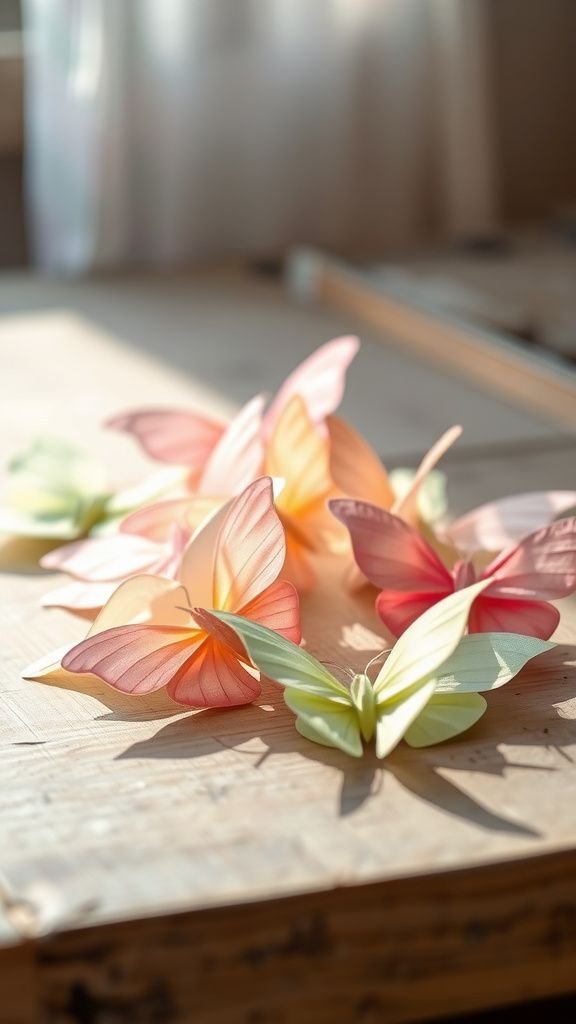
I have a soft spot for tissue paper butterflies because their wings feel almost alive under fingertips. There is a satisfying papery rustle when the wings brush together, and light passes through in pastel pools that remind me of stained glass on a drizzled morning.
The edges often develop a gentle fray that looks charming against faded spring napkins. Whenever I tuck one into a book or atop a wrapped gift, I notice how the crinkled layers catch shadows and give the tiny creature a sense of motion even while it rests.
Steps
- Gather multiple sheets of thin tissue paper in a palette of spring pastels and stack them for layered color.
- Trace and cut symmetrical wing shapes from the stack, separating layers gently to reveal varied textures.
- Pinch a small center for the body and secure with an adhesive dot, allowing wings to crinkle naturally.
- Add antennae with thin floral wire or thread, curling the ends for a soft finish.
Origami butterfly that flutters from a corner
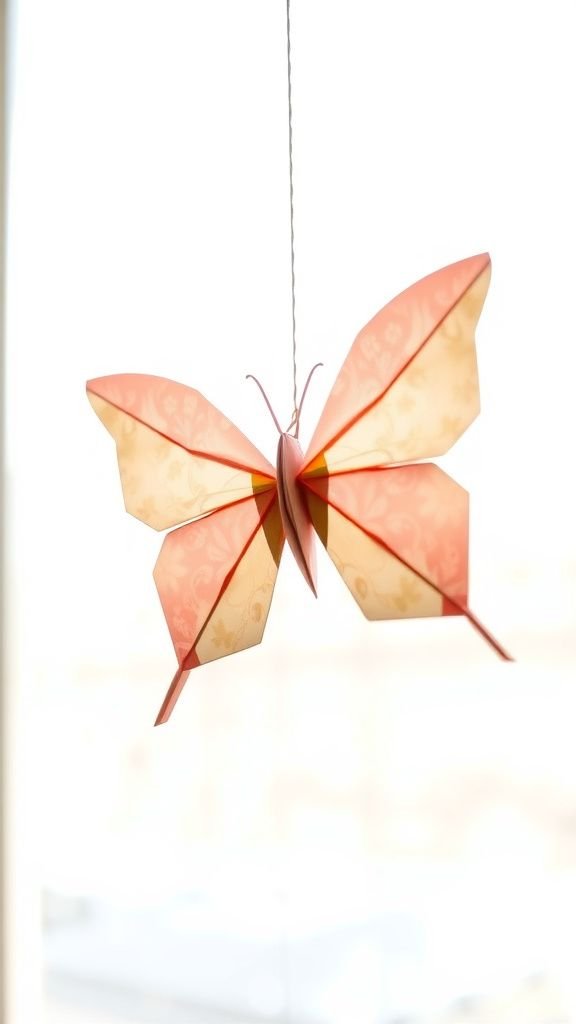
Folding an origami butterfly always brings me back to childhood paper games. The crisp creases create a tiny architecture of wings that somehow manages to look both precise and delicate.
I like the tactile contrast between the smoothness of origami paper and the airy silhouette against a window. Held near a draft it will tremble and seem eager to take off, responding to the room like a shy guest.
Colors that fade gently at the edges give these paper insects an aged charm, as if they carried small weathered stories.
Steps
- Select a square of thin origami paper with a patterned side and smooth reverse.
- Fold along diagonal lines to form a central body, creating crisp mountain and valley folds for wing definition.
- Tuck small flaps inward to form a compact thorax and shape the upper wings with careful creasing.
- Slide a slender strip of thread under the body for hanging so it can sway in a gentle breeze.
Layered paper butterfly with embossed wing layers

There is a quiet satisfaction in tracing embossed ridges along layered wings, watching shadows march along each groove. I remember running a fingertip over the raised veins and thinking of real butterfly wings under a loupe.
Several thin sheets build richness without weight, each layer echoing the one beneath it. When light hits at a low angle the embossing throws gentle shadows that read as tiny ridges, lending a sculptural quality.
The whole piece looks like a pressed moment between pages of a heavy book, delicate but present.
Steps
- Choose coordinating cardstock sheets and cut matching wing shapes in graduated sizes for layering.
- Use an embossing tool or stylus to press vein patterns into each wing layer on a soft mat.
- Stack the embossed layers offset slightly to reveal underlying textures and secure at the center with a small brad or adhesive.
- Attach a thin wire loop beneath the body to let the butterfly perch or hang with a natural tilt.
Quilled butterfly with tight coiled antennae details

Quilling delivers a delicate, lace-like feel that always makes me linger. Watching thin strips curl into coils brings a calm rhythm to the work, and the finished wings glimmer with tiny banded spirals that reflect light differently from each angle.
Antennae formed from neat tapers look impossibly fragile, yet they hold their shape like miniature sculpted reeds. I often arrange quilled butterflies on soft gray backgrounds so the shadows from each coil create a low-relief effect, giving the piece a quiet, contemplative presence on the wall.
Steps
- Prepare narrow paper strips in a coordinated palette and use a slotted quilling tool to roll coils of varying sizes.
- Pinch and shape the coils into teardrops, marquise, and scrolls to compose the wing patterns.
- Assemble the coils on a backing using a small amount of adhesive, arranging them symmetrically around a central core.
- Add thin coiled antennae and mount the finished butterfly on heavyweight paper for display.
Vellum butterflies that glow in sunlight

Translucent vellum wings feel almost ethereal when sunlight leans through them, casting familiar mothlike shadows on tabletops. I love how printed inks on the reverse meld into soft watercolor washes when the light warms them.
The edges often take on a faint iridescence, and the surface has a cool, smooth touch that contrasts with warmer paper textures. Arranged on a windowsill, a group of vellum butterflies creates an ephemeral display where color floats in the air and shifts as the day moves, like tiny weather changes captured on paper.
Steps
- Cut wing shapes from cream or colored vellum, experimenting with rounded and angular silhouettes for variety.
- Ink or watercolor the reverse side with light washes to create subtle gradients that appear luminous in light.
- Layer two vellum wings slightly offset and secure centers with a thin strip of paper to form a body.
- Suspend from clear thread at varying heights so they catch sunlight and cast soft colored shadows.
Watercolor wash wings on lightweight paper

Working with watercolor on thin paper yields wings that feel like tiny paintings. The pigments bloom into organic patterns, and the paper edges take on a feathered halo where color finds the fiber.
There is always a small surprise when pigments mingle, forming mottled veins or speckled tips that look utterly natural. I enjoy leaving small watermarks that read like morning dew.
When paired with a faint graphite body, the whole insect reads like a botanical sketchbook entry, quiet and intimate enough to tuck into a letter.
Steps
- Stretch lightweight watercolor paper slightly to prevent heavy warping, then sketch delicate wing outlines with pencil.
- Apply wet-on-wet washes in complimentary hues, letting pigments bloom and mingle to form soft veining.
- Add concentrated pigment or salt for texture, lifting color for highlights with a damp brush if needed.
- When dry, trim to shape and mount on a slightly sturdier card for support.
Paper mosaic butterfly using magazine scraps

There is a playful joy in turning old magazines into mosaic wings, where glossy bits clash and harmonize unexpectedly. The sheen of photographic paper contrasts with matte magazine pages, creating a patchwork that shimmers under lamps.
Collaged pieces form a kind of visual noise that reads like wing scales when arranged densely. I often chase complementary tones from unexpected images—an orange from a sunset photo beside a teal from a fashion spread—and the result feels improvised and lively.
Edges are slightly irregular, which gives the insect an improvised, scrappy personality I find charming.
Steps
- Tear or cut small irregular shapes from colorful magazine pages to create a palette of glossy fragments.
- Arrange fragments tightly on a pre-drawn wing silhouette, overlapping edges to mimic a scale-like texture.
- Adhere pieces gradually from the center outward, smoothing each down to avoid air pockets.
- Seal the completed mosaic with a matte varnish or clear finish to unify the surface sheen.
Pop-up butterfly card that folds flat

A pop-up butterfly card carries a small theatrical flourish that always delights anyone who opens it. The moment of unfolding feels like a private reveal, and the three-dimensional wings cast playful shadows across the interior.
The hinge of the pop-up has a faint springy quality, and paper creases hold memory like a tiny pleat line. I like pairing bold patterned interiors with a complementary exterior so the surprise is cheerful rather than loud.
Tucking one into a pocket or sending it through mail feels like slipping a secret smile across miles.
Steps
- Create a card base from sturdy cardstock and sketch a butterfly shape that will pop when the card opens.
- Cut matching inner elements and score fold lines where the wings will rise, ensuring smooth hinges.
- Attach the pop-up mechanism to the card interior aligning folds for a balanced lift.
- Decorate the interior and exterior with patterned paper, ink, or small embellishments without hampering the pop-up motion.
Butterfly garland drifting across a mantel
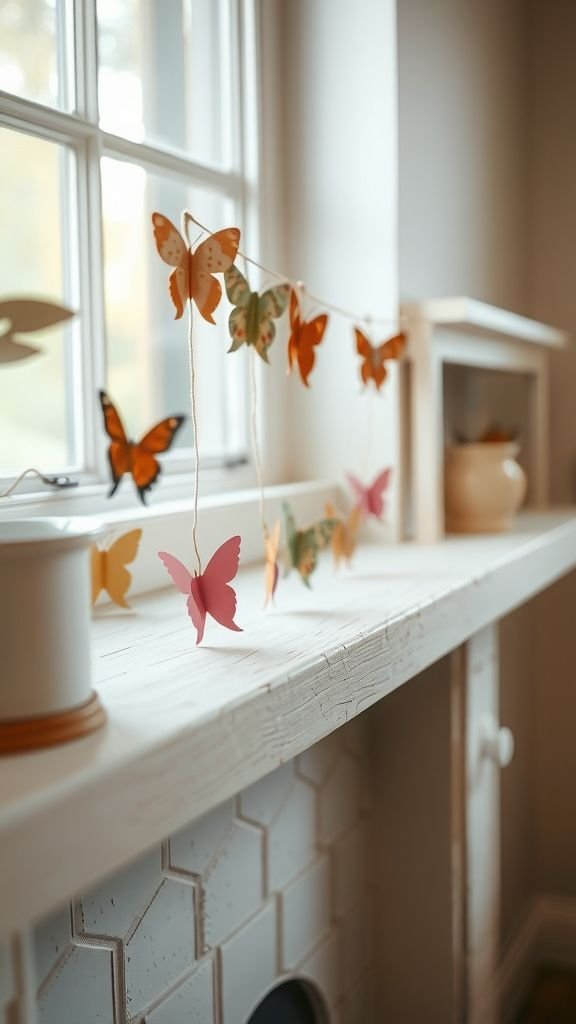
Stringing butterflies into a garland turns small paper creatures into a friendly procession across the room. The garland adds an informal rhythm to a mantelpiece, each butterfly catching light differently and lending motion to an otherwise static shelf.
I like to mix textures to avoid uniformity; a sequence of vellum, tissue, and painted paper creates a subtle tempo. The tiny gaps between specimens make the display feel airy, like a slow parade on a spring breeze.
Guests often pause to feel the paper or admire a favorite wing pattern, which is a gentle kind of attention.
Steps
- Prepare a collection of butterflies in complementary sizes and textures for visual interest.
- Space them along a length of thin twine or fine ribbon, either piercing centers or fastening with small loops.
- Tie knots or secure adhesive points to fix placement so butterflies maintain gentle spacing.
- Drape the garland across a mantel or along a window ledge, adjusting heights for a relaxed sweep.
Shadow box with suspended butterfly garden

A shadow box turns paper butterflies into a contained three-dimensional scene, where depth invites quiet contemplation. The suspended insects float above a layered background, and the interplay of shadow and paper becomes the main show.
I enjoy building little vignettes inside the box, like a tiny meadow suggestion with muted greens and soft beige. Viewing the box at different angles reveals shifting relationships between wings and background elements, like a framed moment of motion frozen in paper.
The compact scale makes these pieces intimate, ideal for a bedside table or hallway shelf.
Steps
- Choose a shadow box frame and design a layered background using painted paper or printed textures.
- Mount thin wires or clear threads at varying depths to suspend butterflies within the frame.
- Position butterflies so they appear to be flying toward or away from the viewer, adjusting heights and angles.
- Secure all supports and close the frame, checking that shadows land as intended under gallery lighting.
Pressed flower butterfly collage on cardstock
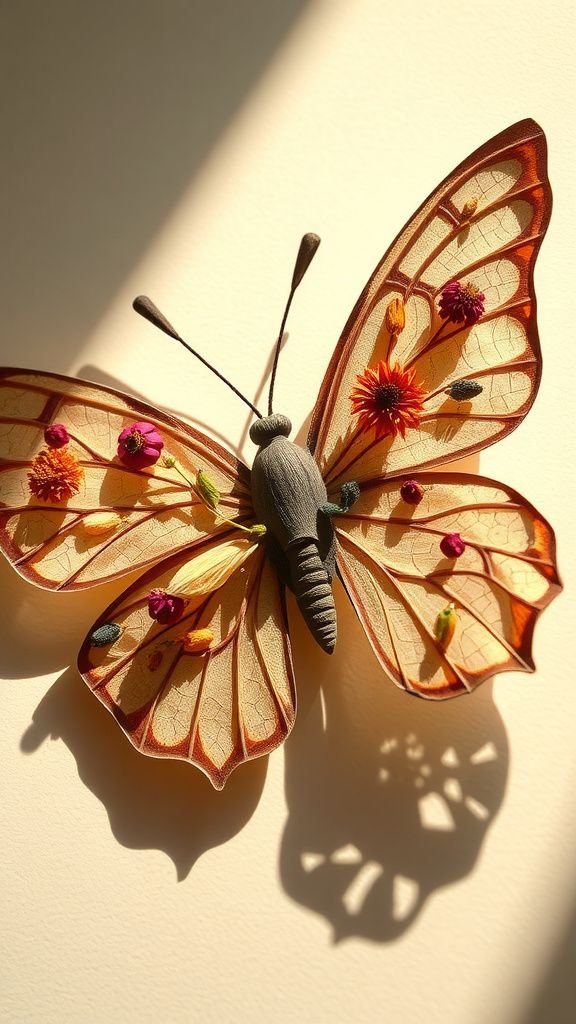
Combining pressed flowers with paper wings creates a fragile, botanical kind of elegance that I never tire of. Petals pressed flat tuck into wing spaces like preserved secrets, and the color palette comes from the garden itself.
The surface has the brittle whisper of dried flora, and the contrast between organic petal edges and neat paper shapes feels thoughtfully undone. When sunlight brushes the composition the translucence of some petals becomes evident, lending a layered, nostalgia-tinged beauty.
These collages always make me think of summer afternoons in a sun-drenched greenhouse.
Steps
- Press small blossoms and leaves between absorbent paper until completely dry, selecting pieces that fit wing contours.
- Arrange pressed flowers on cardstock wing shapes, experimenting with placement for balanced composition.
- Adhere pressed elements gently with archival adhesive to protect color and texture.
- Optionally frame the finished collage under glass to preserve delicate petals and prevent damage.
Butterfly lanterns glowing with tea light silhouettes

Paper lanterns shaped like butterflies add a cozy, warm glow to spring evenings. The gentle light glows through paper wings, emphasizing veins and any painted details with a soft halo.
There is a comforting hush when the room dims and these lanterns come alive, their shapes stretching into elongated silhouettes on nearby walls. I often pick soft warm LEDs rather than open flames for ease and safety, and the result feels like borrowed twilight—intimate, slightly theatrical, and very friendly to late-night conversations by a window.
Steps
- Construct a cylinder or box-shaped lantern base from treated paper or thin cardstock, leaving a window for the butterfly silhouette.
- Cut or attach butterfly shapes to the lantern exterior so their outlines are visible when lit from within.
- Install a battery-operated tea light or warm LED inside the lantern for safe, steady illumination.
- Place lanterns on a shelf or hang them with a thin cord to cast soft butterfly-shaped shadows.
Chrysalis ornaments transforming in translucent paper

Chrysalis-shaped ornaments made from translucent paper have a poetic hush, like capturing a private metamorphosis. They feel slightly heavy in the hand yet fragile, with layered papers creating subtle opacities and faint mottled patterns.
Light passing through gives the illusion of an inner glow, lending them a contemplative presence when hung in a quiet corner. I like the way they balance a sense of pause and imminent motion; they are reminders of small transitions, displayed among potted plants or suspended from a spring branch in a simple, reflective arrangement.
Steps
- Shape thin translucent paper into elongated, tapered forms and secure edges with a light adhesive to hold the chrysalis silhouette.
- Layer additional papers or tissue inside to create gentle variegation and depth.
- Attach a thin loop of thread at the top for hanging and allow all adhesive to dry fully.
- Arrange the ornaments at varied heights from a branch or in a clustered grouping for an intimate display.
Paper mache butterfly with textured wing veins
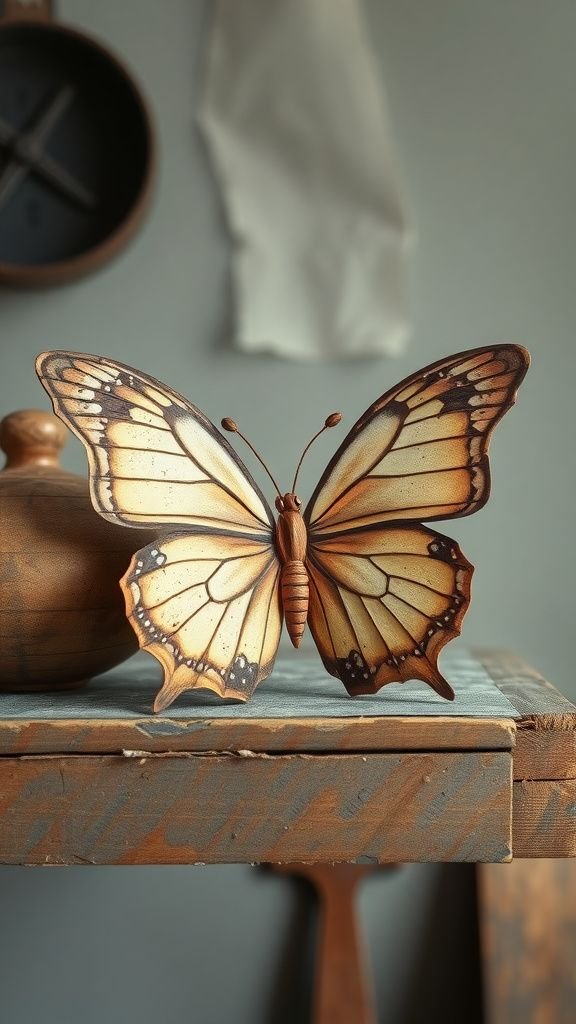
Paper mache adds a sculptural heft that transforms butterflies into tactile little reliquaries. The surface feels hand-built, with tiny lumps and fingertip marks that tell the story of making.
Wing veins can be suggested with ridgey paper strips or raised paste, creating a weathered, almost ceramic-like finish when painted. I enjoy the contrast between the rough lance of built texture and the soft washes of color over the top.
These pieces look at home on a mantel with pottery and old books, as if they were small artifacts from a well-loved curiosity cabinet.
Steps
- Create a base armature for wings and body using lightweight cardboard or thin wire and wrap with layered paper strips dipped in paste.
- Build up texture along wing veins using additional paper strips or a thicker paste application to form raised ridges.
- Once dry, sand lightly for a worn finish and apply paints in muted washes to emphasize texture.
- Seal with a matte varnish or beeswax finish to protect the surface and enhance depth.
Confetti-stuffed paper butterflies for party joy

Confetti-filled paper butterflies feel playful and celebratory, like holding a tiny burst of spring. They rustle with brittle paper sounds and, when tapped, whisper little clinks from the paper bits inside.
I enjoy the way light dances off metallic confetti peeking through semi-opaque wings, creating sparkles that shift with every nudge. They bring an instant sense of festivity when scattered across tables or clipped to napkins, and their bouncy silhouette makes them especially appealing at outdoor gatherings where wind adds an extra element of choreography.
Steps
- Cut two matching wing shapes from semi-opaque paper and leave a small open pocket at the center for filling.
- Spoon a modest handful of confetti or small paper shapes into the pocket to create an internal sparkle.
- Seal the pocket edges with adhesive or a narrow strip of matching paper, ensuring the center remains slightly raised.
- Add a small decorative band or paper body and place on tables or tie to party favors for a lively touch.
Button-and-paper mixed media butterfly brooch

Combining found buttons with paper wings yields a charming brooch that feels both vintage and playful. Buttons add a tactile center and a hint of nostalgia with their worn sheen and mismatched holes.
Paper wings can be layered behind or under the button to create a dimensional badge that catches pockets and lapels with ease. I often choose buttons rescued from old sewing boxes because they carry memory, and the contrast between hard button edges and the softness of paper makes the whole piece feel like a remixed heirloom ready for new life.
Steps
- Select a sturdy backing such as heavyweight paper or thin felt to support the brooch structure.
- Layer cut paper wings and arrange one or more vintage buttons as the central body element.
- Secure components with strong adhesive and attach a jewelry pin backing to the reverse.
- Allow to dry fully before wearing, and consider a small coat of varnish on the paper for durability.
Butterfly bookmarks with tassel and painted edges

Bookmarks shaped like butterflies make reading feel a little more magical. The fluttering silhouette peeks from a book spine, adding color and personality to quiet reading corners.
Painted edges give a refined touch, where the color frames pages like a gentle sunset. Tassels swing slightly when the book is carried, producing a soft whisper that suggests movement.
I enjoy slipping a bookmark into a novel and returning to it days later, finding the tiny insect waiting patiently between chapters as a small vow to return.
Steps
- Cut bookmark-sized butterfly shapes from sturdy cardstock and reinforce edges with clear tape or light lamination for durability.
- Paint or ink the edges with a contrasting hue to create a framed look around the body.
- Punch a hole at the top center and attach a tassel made from embroidery floss or thin ribbon.
- Optionally add simple stamped details or handwritten notes to personalize each bookmark.
Mini accordion-fold butterflies on thin wire
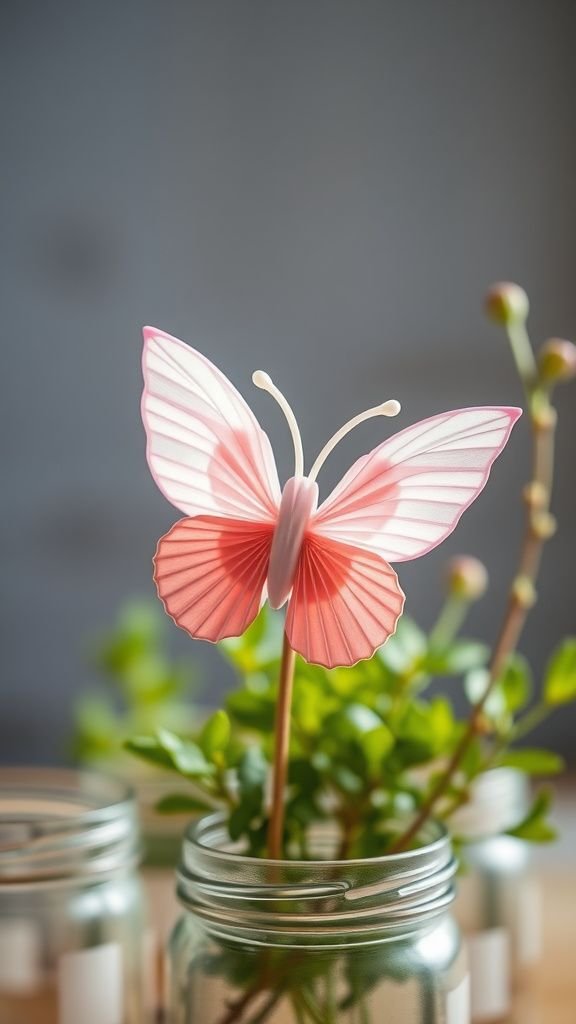
Accordion-fold wings add a playful bounce that responds to the slightest motion, making these butterflies feel almost musical. The pleats create tiny valleys and ridges that catch light in alternating bands, producing a lively shimmer as they sway.
Mounted on slender wire stems they can be planted among potted herbs or placed into small bud vases to bring instant cheer. I enjoy how the folded wings compress down flat and then spring open, their geometry lending a modern, rhythmic energy to a tabletop cluster.
Steps
- Cut narrow strips of paper and fold them into tight accordion pleats to form compact wing units.
- Fan open the pleated units and secure centers to shape wings with a springy profile.
- Attach wings to thin floral wire or craft stems, anchoring with adhesive or small floral tape.
- Arrange stems in small jars or tuck into potted plants so butterflies appear to hover above foliage.
Hanging mobile of layered translucent butterflies
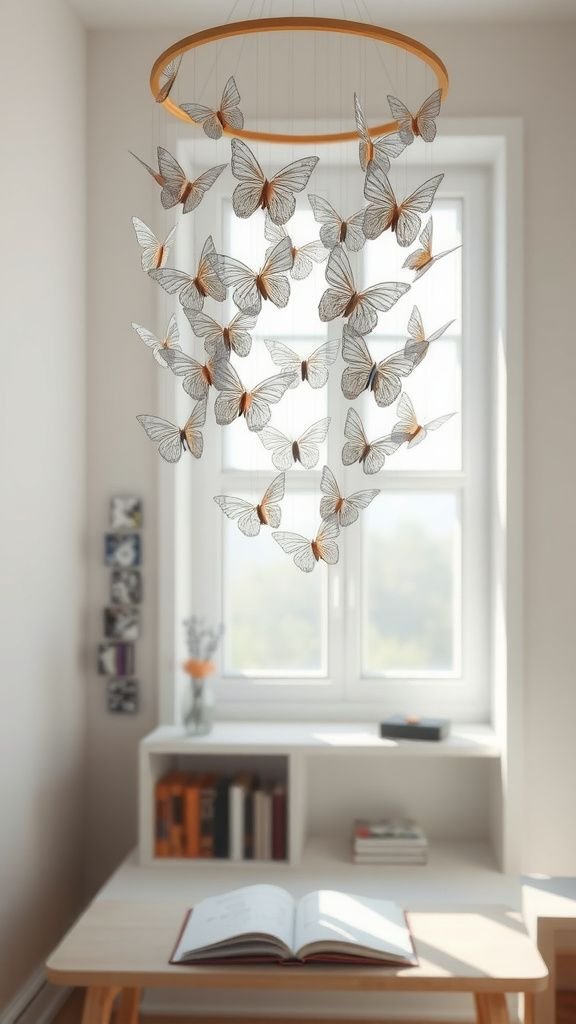
A hanging mobile populated with layered translucent butterflies feels like an indoor breeze frozen in time. Layers shift gently against each other, producing whispering collisions of paper and soft, fleeting overlaps of color.
I like the way the mobile moves as people pass beneath it, creating a slow choreography that never repeats exactly. The sound is a faint papery murmur, and when hung near a tall window the pieces throw prisms of soft color across the room.
It becomes a living decoration, subtly reminding the eye to rest.
Steps
- Cut multiple butterflies from semi-transparent papers in a cohesive color scheme and layer a few for varied depth.
- Tie each butterfly to lengths of monofilament or fine thread at different intervals to encourage balanced movement.
- Suspend the threads from a circular frame or driftwood base, spacing elements so they can rotate freely.
- Hang the mobile where gentle air currents will set it in motion, checking for graceful balance.
Embossed metallic paper butterflies for shimmer

Metallic papers lend a quiet glamour that feels festive yet refined. Embossing those papers brings out subtle ridges that flash when turned, like tiny coin-like wings.
There is a cool, almost mineral sensation when touching the surface, and the reflective finishes play wonderfully with evening lamps. I place embossed metallic butterflies near darker backgrounds to let their shimmer sing without shouting.
They behave like jewelry for a wall, catching attention in a soft, tactile way that rewards a slow look instead of demanding it.
Steps
- Select metallic cardstock and draft wing shapes, allowing for slight curvature to enhance reflection.
- Use an embossing folder or stylus to press vein patterns and subtle texture into the metallic surface.
- Shape wings slightly by curving along a rounded tool to create reflective angles.
- Mount on a dark matte backing to maximize contrast and showcase shimmer under spotlighting.
Butterfly centerpiece with cascading paper wings
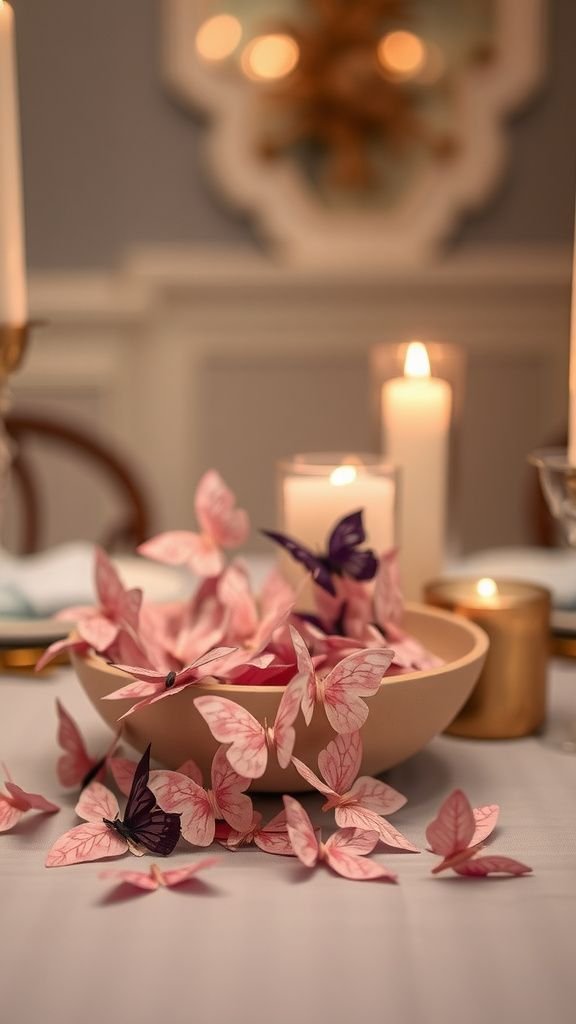
A table centerpiece built from cascading paper wings makes the whole meal feel like it’s set under a gentle canopy. Layers of wings descend in a soft waterfall, creating a sense of abundance without heaviness.
The paper edges catch candlelight and throw small, moving shadows across plates, lending intimacy to dinners. I favor muted tones with a few bold accents so the display feels lively but not loud.
Guests often remark on the movement and the piece becomes a quiet conversation starter as people lean in to admire the details.
Steps
- Design a central base, such as a low bowl or foam block, to anchor cascading wings securely.
- Prepare multiple wing elements in graduated sizes and attach them around the base to form layers.
- Allow some wings to drape over edges for a waterfall effect and insert small supports to maintain flow.
- Add a few botanical touches or battery candles to integrate the centerpiece with the table setting.