I started labeling my spring seedlings one rainy afternoon with whatever I could find, and the small ritual of making garden markers quickly became a favorite way to welcome the new season. Easy Spring Garden Marker Crafts felt like a tiny weekend project that brightened seed trays and made the whole porch look friendlier.
Over a few seasons I learned which styles held up to watering and which faded after sunlight.
These Easy Spring Garden Marker Crafts are a mix of quick, tactile projects and surprisingly durable pieces that bring a little personality to beds and containers.
Hand-lettered wooden spoon garden markers with flair
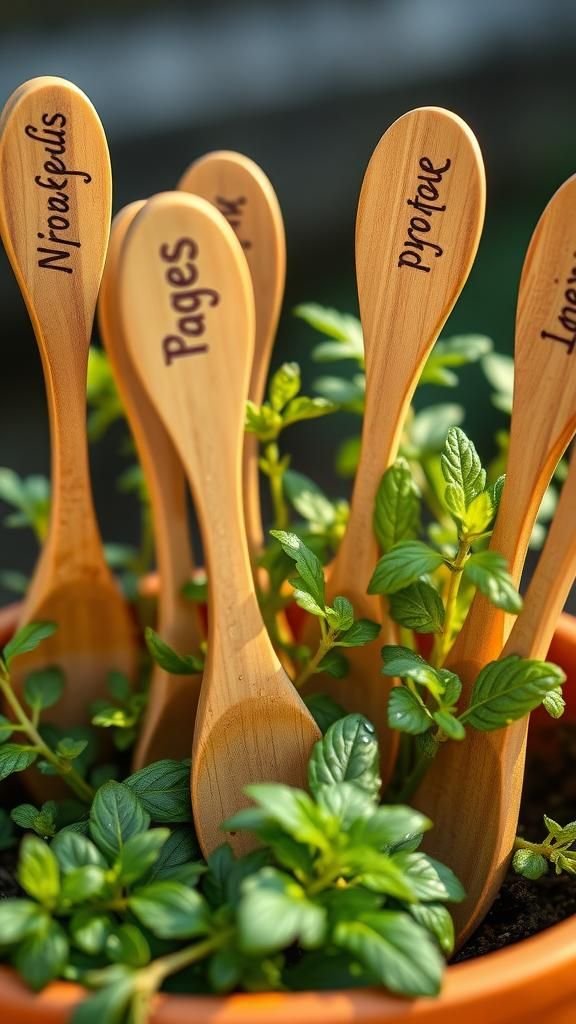
There’s a simple, homey charm to wooden spoons tucked into a pot, letters curling along the handle and a warm grain beneath ink. I remember the soft scrape of marker against wood and the slight scent of vintage utensils mingling with damp soil.
The handles lean at playful angles, catching morning light, and the words sometimes blur into a smudged watercolor after a heavy shower. These markers feel like small stories planted next to basil and thyme, an everyday kind of delightful that makes me smile while watering.
Steps
- Lightly sand each spoon handle until smooth and wipe away dust.
- Apply a clear outdoor primer and allow it to dry thoroughly.
- Write plant names with weatherproof ink markers, letting letters rest between strokes.
- Coat the written section with a clear outdoor sealer and let it cure.
Painted smooth rocks with handwritten names
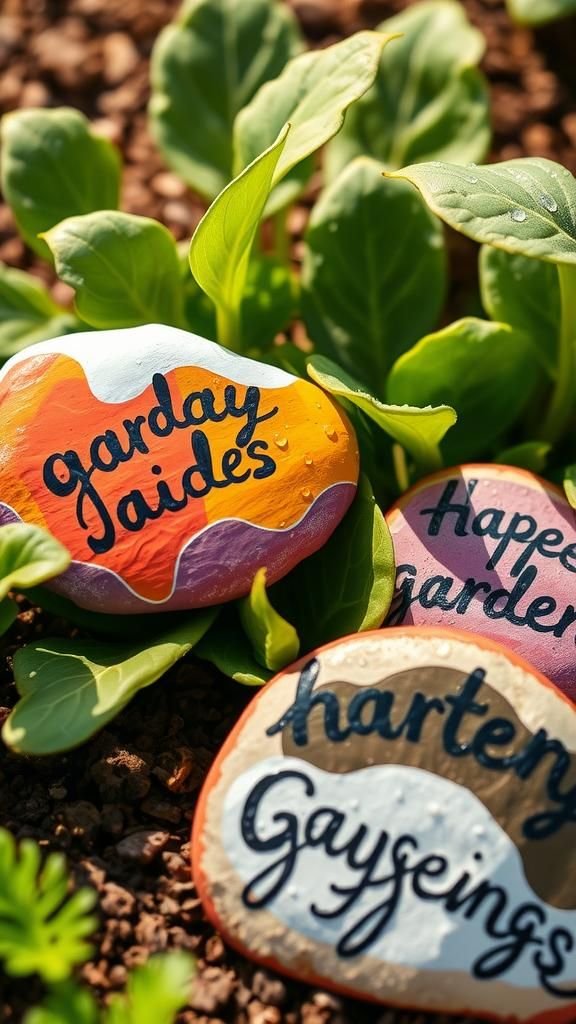
Flat stones gathered from a stream became tiny canvases, each one cool and heavy in the hand with a glossy varnish that caught sunlight. I liked how a smooth pebble nestled among lettuce looked like a secret label, its edges warmed by sun and cooling when sprinklers passed.
The contrast between the matte of the stone and the sheen of letters made each marker feel like a miniature signpost. Colors faded gently over weeks, giving a softly weathered look that blended naturally into the garden beds without shouting.
Steps
- Wash and dry each stone, removing loose grit.
- Apply a base color with outdoor acrylic and let it dry fully.
- Write plant names with a fine permanent marker or paint pen.
- Seal the surface with an outdoor clear coat and let it cure.
Whimsical wine cork seedling stakes for pots
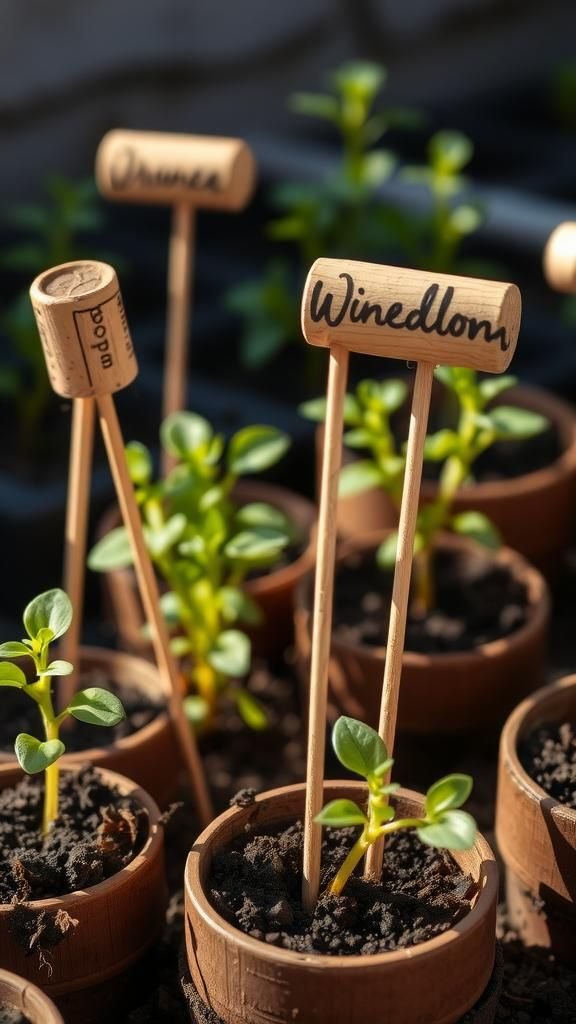
Wine corks have a satisfying density when pressed into loose compost, and they carry a faint aroma like summer evenings. I remember collecting corks after gatherings and thinking they looked too friendly to throw away.
Stuck onto thin wooden skewers they became small signposts, their rounded tops catching little shadows. The inked names sometimes smudged after an unexpected shower, but the overall effect was cheerful, a rustic cluster of markers bobbing among carrots and young lettuces as they peeked above the soil.
Steps
- Push a thin wooden skewer into each cork until secure.
- Write plant names on the cork ends with a permanent marker.
- Coat the written area with clear waterproof sealer and allow to dry.
- Insert the cork-topped skewer into the potting soil next to seedlings.
Vintage key metal tags for an antique touch
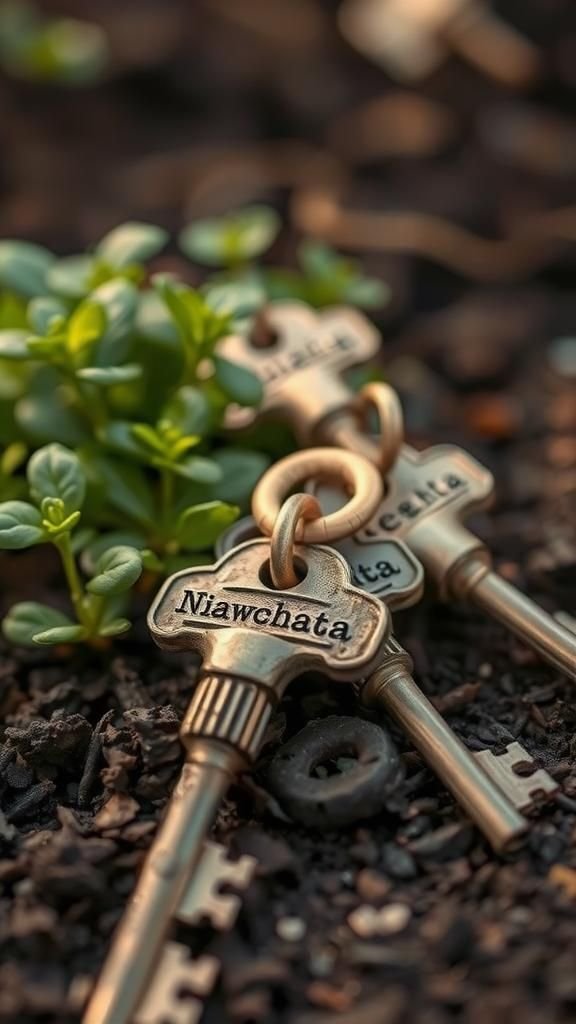
Old keys hold a kind of mystery, their cool metal ridges and tiny teeth catching light like miniature sculptures. When transformed into garden tags, they sit at the base of plants like tiny relics from another season.
I enjoy the weight of them leaning against stems and the subtle chime they make when a breeze passes. Their patina tells a slow story of time, and handwritten plant names scratched into soft metal have a tactile quality, as if the garden borrowed a piece of history for a day.
Steps
- Select vintage-style keys and gently clean off loose rust with a brush.
- Punch or file a small flat area for naming and write names with an engraver or metal pen.
- Seal with a thin coat of clear outdoor lacquer to protect the inscription.
- Place keys flat on the soil or lean them gently against plant stems.
Stamped copper tags with gentle patina finish
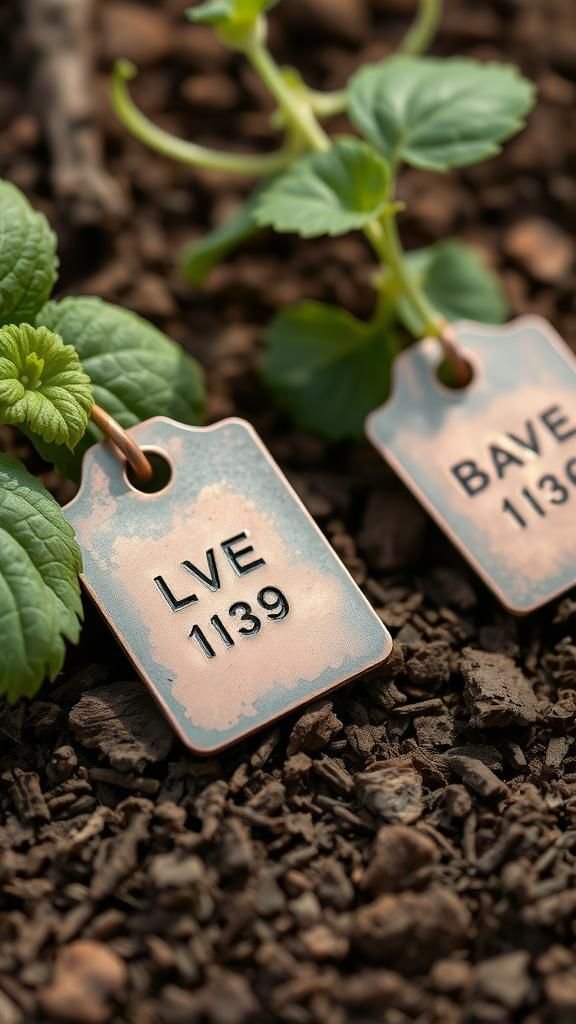
Thin copper tags have a soft metallic glow that deepens with time, a warmth that felt almost jewel-like against leafy greens. I remember how the hammered edges clicked faintly when shaken and how tiny punched letters held shadows like miniature typefaces.
Over weeks a greenish tint could appear, adding character and a quiet vintage feel. The tags sat flat and neat, catching afternoon light and reflecting faint glimmers onto nearby leaves, a small, almost secret bit of craft tucked into each planter.
Steps
- Cut copper sheet into small rectangular tags and smooth rough edges.
- Stamp plant names into the metal using letter stamps and a mallet.
- Create a patina by applying a copper aging solution and rinse off after reaching desired tone.
- Punch a hole for optional mounting and hang or lay the tags beside plants.
Chalkboard paint on sticks for ever-changing notes
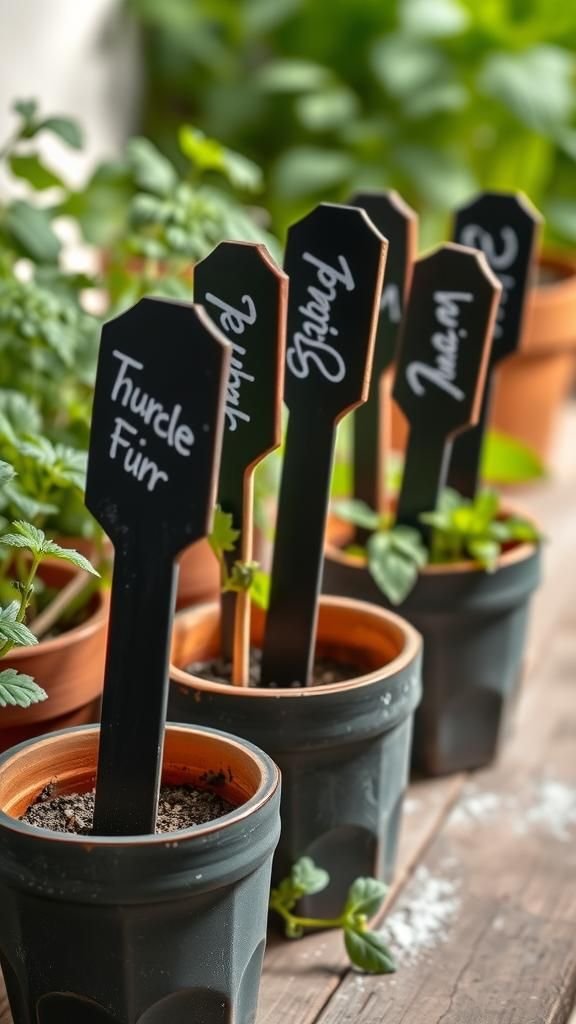
Little chalkboard sticks brought back a schoolyard nostalgia, the matte black surface catching soft white letters and tiny smudges of color. I liked how fingers left faint chalk shadows after writing, and how rain could blur edges into gentle smears that then dried into a new look.
They slot neatly into pots and can be updated with a quick wipe, so the markers feel lively, not fixed. The tactile dust of chalk and the cool smoothness of the painted surface made labeling feel like a small, ritual pause in the day.
Steps
- Paint wooden plant stakes with chalkboard paint and allow to dry completely.
- Write plant names with white or colored chalk pencils for clarity.
- Optional: fix chalk markings with a matte spraying fixative if desired.
- Place the stakes gently into pots or beds where they remain visible.
Stamped clay tags that age with garden life
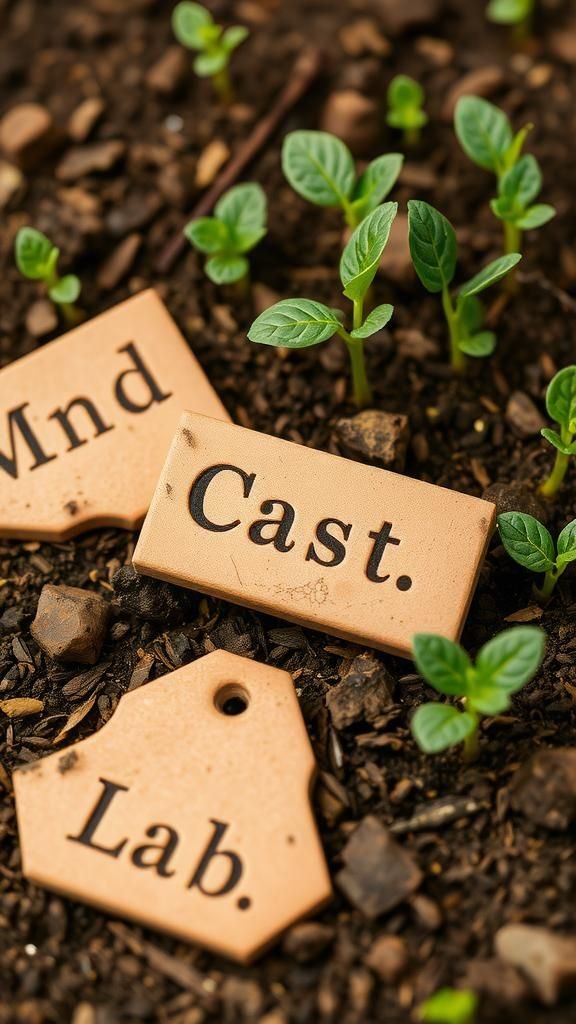
Air-dry clay tags have a satisfying coolness when I press letters into them, and the little imperfections in each impression feel warm and humane. I enjoy the grainy texture at the cut edges and the small dusting of soil that clings after being tucked into beds.
Over time the tags take on a faint weathered look, tiny chips and softened corners telling a quiet story. They sit low and solid next to seedlings, their muted earthy tones blending with the beds like discovered artifacts rather than manufactured labels.
Steps
- Roll out air-dry clay to even thickness and cut into tag shapes.
- Press plant names into clay with letter stamps and create a hole for mounting.
- Allow tags to dry thoroughly according to clay instructions.
- Tie tags to stakes or lay them flat beside plants in the soil.
Recycled spoon handles turned elegant plant labels
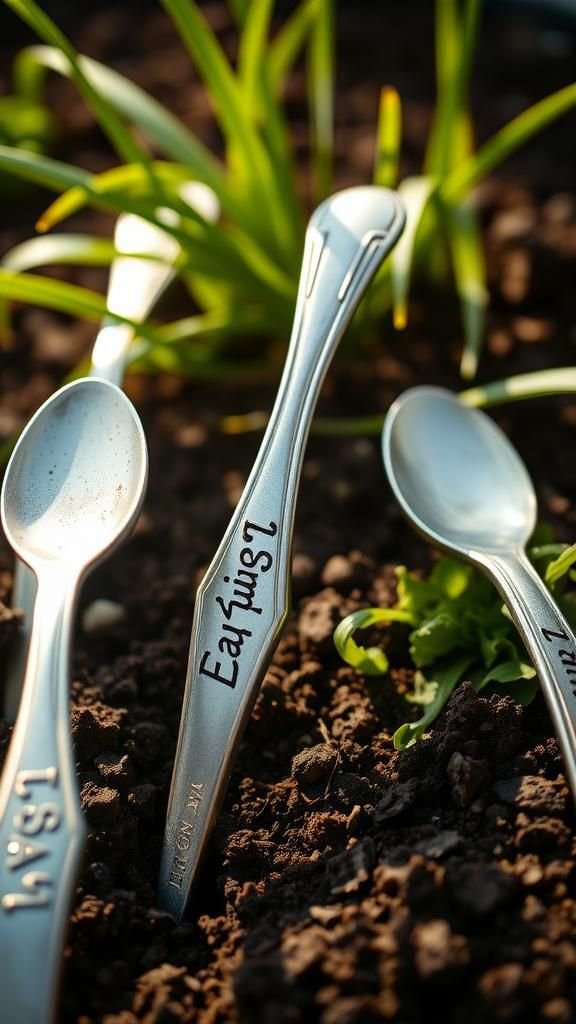
Old silverware handles have a surprising elegance when planted upright, their ornate ends catching light and reflecting small highlights. I remember a box of mismatched cutlery that felt too charming to part with, and they became little vertical accents among tomatoes.
The cool metal against warm soil felt like a small act of thrift turned beautiful. Names etched into the backs picked up tiny flecks of dirt that softened the polished look, making each marker feel at home in a living patch of green.
Steps
- Select old spoon handles and clean them thoroughly.
- Cut handles to desired length and smooth any sharp edges with a file.
- Engrave or stamp plant names onto the metal surface.
- Insert handles into soil or mount onto short stakes near plants.
Scrabble tile stakes for playful little labels
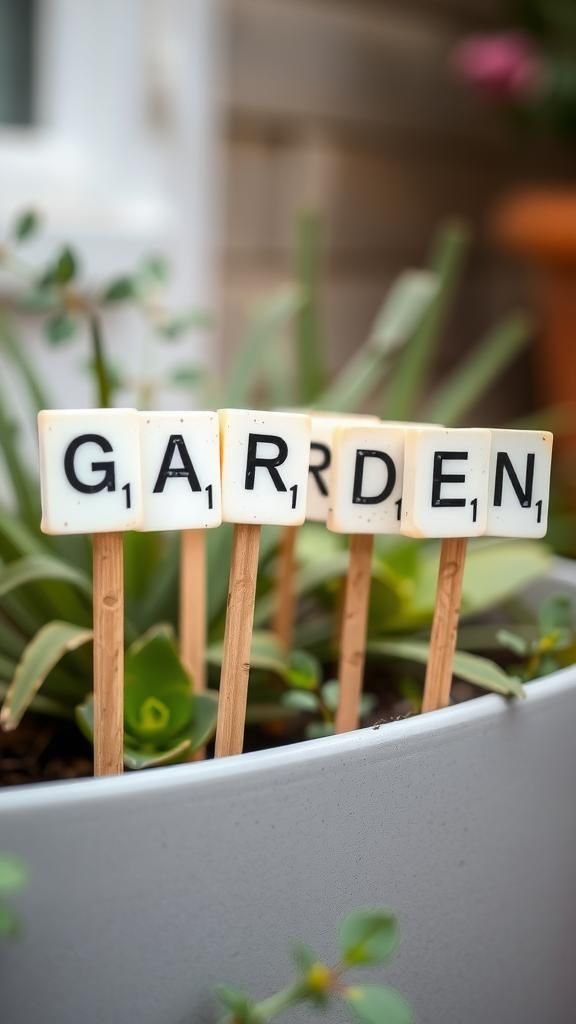
Tiny square tiles with embossed letters feel like a secret code when nestled among seedlings. Their tactile edges and popped letters invite fingers to trace names slowly, and the playful layout brings a sense of whimsy to orderly rows.
I liked the soft clack as I arranged them and the way sun glinted off the enamel glaze. When grouped, the tiles create a small mosaic of letters that feels both nostalgic and crafty, a gentle reminder that labeling can be fun and slightly mischievous.
Steps
- Choose Scrabble tiles and clean them to remove any residue.
- Adhere tiles onto thin wooden stakes with outdoor-rated adhesive and allow to set.
- Seal exposed surfaces with a clear outdoor sealer for weather resistance.
- Place the tile-topped stakes into pots or garden beds near the corresponding plants.
Bottle cap markers with tiny painted icons
![]()
Bottle caps turned tiny canvases feel delightfully small and cheerful, their ridged edges catching the eye like miniature wreaths. I’m fond of the snug sound when they press into soil and the slight metallic tang they carry.
Painted icons inside a cap add an extra personality, a tiny carrot or leaf rendered with a few careful strokes that brightens a patch of earth. The glossy interior contrasts against matte soil, and when a breeze brushes past, the caps glint like compact little signals.
Steps
- Clean bottle caps and flatten slightly if needed, smoothing edges.
- Paint small plant icons or names inside caps and allow to dry.
- Seal the painted interior with an outdoor clear coat.
- Mount the capped tops onto short stakes or place them directly into soil.
Pressed leaf laminates for botanical simplicity
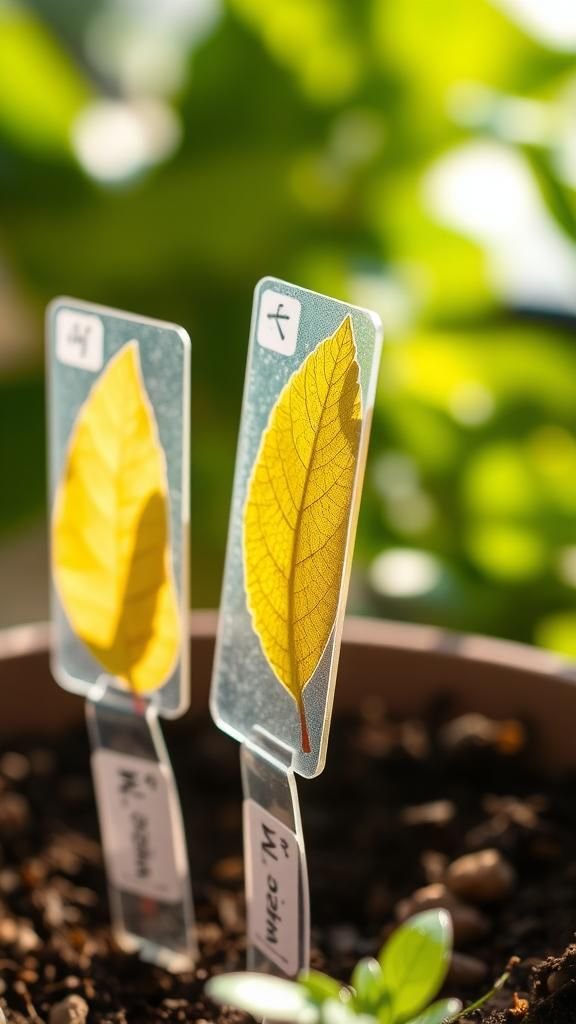
Transparent laminates with pressed leaves and tiny labels feel like pockets of calm, each one capturing a piece of a plant in crisp detail. I found a quiet pleasure arranging slender leaves and tiny blooms inside, watching veins line up like delicate maps.
When set on stakes they let natural color breathe through while protecting the fragile pressed pieces from rain. The result is an airy, almost museum-like tag that feels gentle and light against the heavier backdrop of soil and stems.
Steps
- Press chosen leaves or small blooms between heavy books until flat and dry.
- Place pressed specimens between clear laminating sheets and seal edges.
- Trim laminates to size and punch a hole for mounting.
- Attach laminates to stakes or small rods and place near plants.
Mosaic tile shards for colorful garden labels
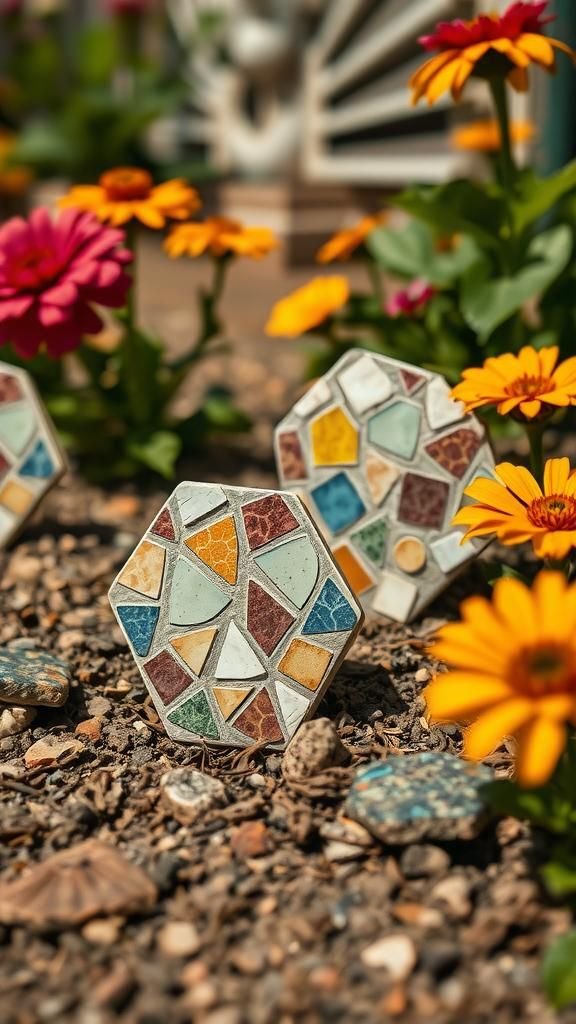
Little shards of ceramic and tile create a lively collage when arranged into names or symbols, each shard catching light like a tiny piece of a mosaic sky. I remember sorting bright fragments across a table, the clink of ceramic and the thrill of a color match.
Embedded into a base, the shards sit low against the soil and offer a textured, playful surface. As sunlight moves they flash sparingly, and the chipped edges lend a handcrafted sensibility that feels artisan and slightly rebellious against neat rows.
Steps
- Select ceramic or glass shards and smooth very sharp edges with a file.
- Arrange shards into a name or design on a small base and bond with outdoor adhesive.
- Grout around shards if desired and let the grout set.
- Place the finished mosaic marker into the garden soil near the corresponding plant.
Charmed twine tags with tiny wooden discs
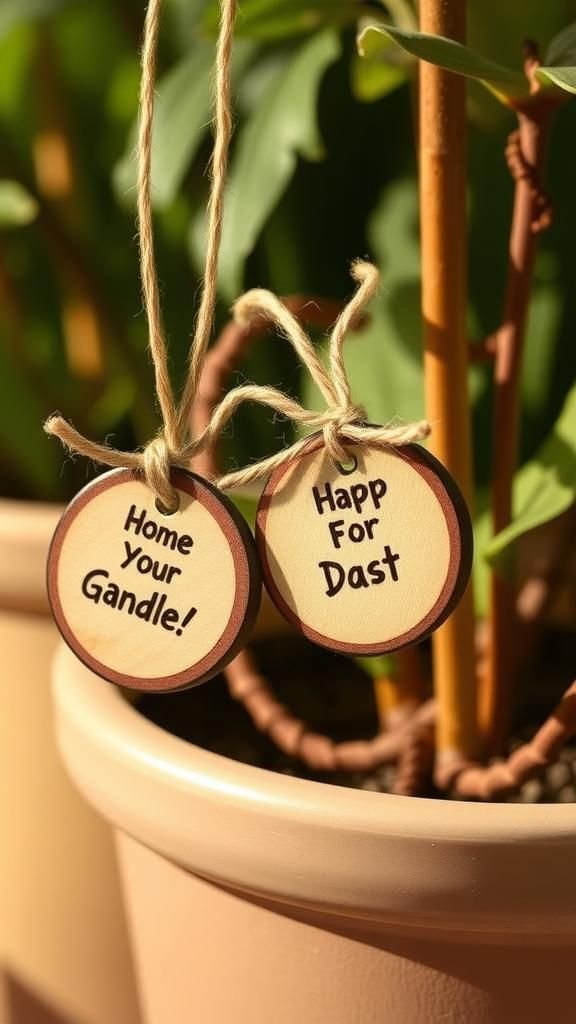
Small wooden discs threaded with twine feel charming and cozy, the fibers soft against fingers and the discs warm from sun. I liked the quiet rustle when a breeze shifted the tags and how the handwriting on each little round piece seemed intimate, like a handwritten note tied to a plant.
Laid against pots or looped around stems they give a homespun vibe, neighboring plants seeming to wear tiny name badges. The natural fibers and wood grain pair nicely with pots full of soil and green shoots poking upward.
Steps
- Write plant names on small wooden discs with a permanent marker.
- Thread discs onto natural twine and knot securely.
- Optionally add a small bead for weight and aesthetic.
- Tie or loop the twine around pot rims or plant stems as desired.
Slate shards with chalked botanical names
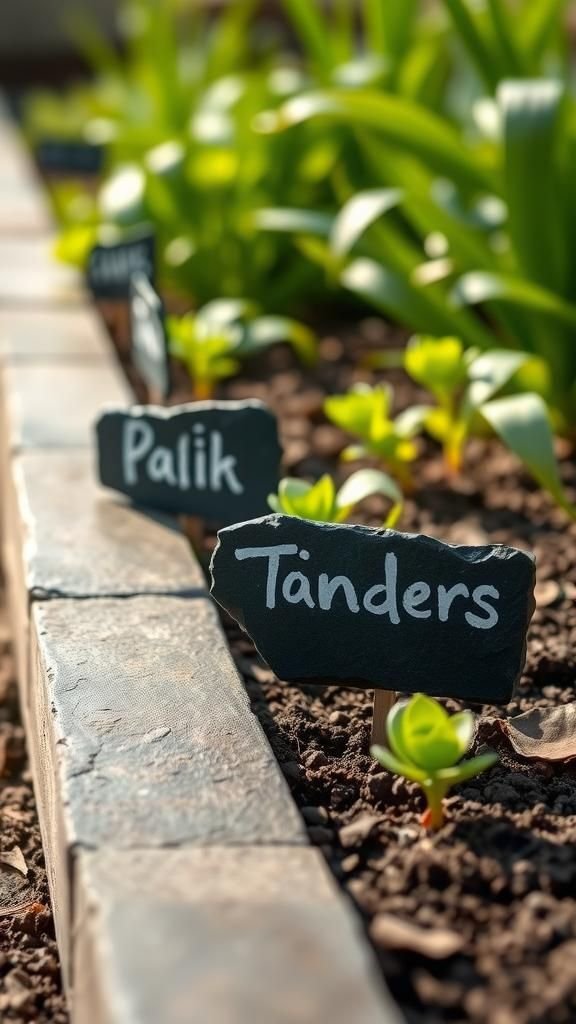
Pieces of slate have a flat elegance, a slim dark canvas that makes chalk stand out like handwriting on a tiny blackboard. I enjoy the cool, smooth touch of slate and the way chalk letters sit boldly against it, sometimes smudging into soft halos after watering.
Placed at the front of a bed, they feel understated and modern; their dark surfaces frame the bright greens behind them. Over time the edges pick up a dusting of soil, blending the slate into the garden palette instead of shouting for attention.
Steps
- Select thin slate pieces and wash off loose debris.
- Write plant names on the slate with chalk pencils for clarity.
- Smudge or fix chalk lightly if a subtler look is preferred.
- Press the slate shards into soil at the front of beds or pots.
Mini terracotta pots as upright plant signs
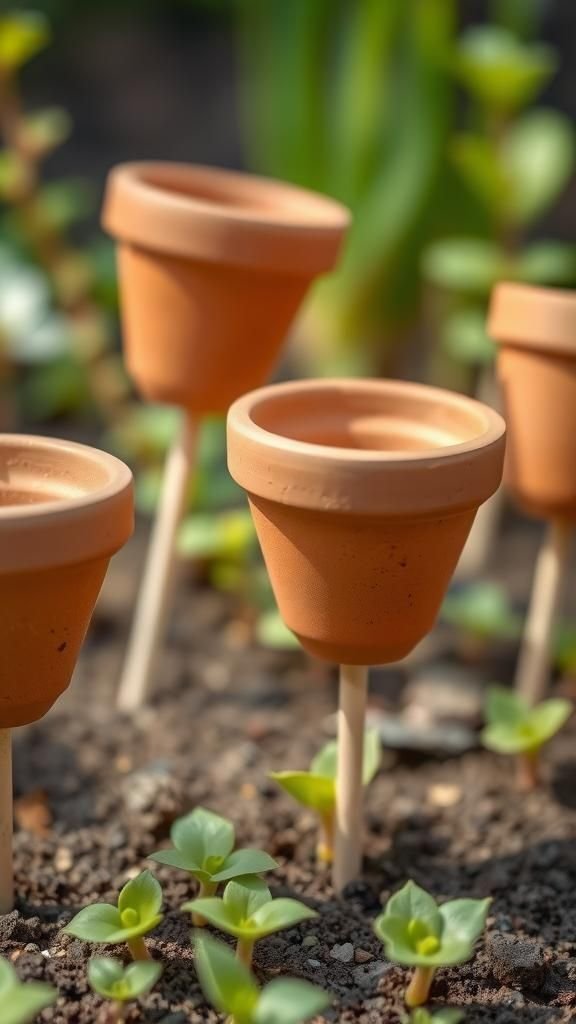
Tiny terracotta pots turned upside down create a quaint little roof for a handwritten tag beneath, the clay surface warm and sun-baked. I loved the dustiness of new clay and how it matched the color of the earth, making the markers feel like a natural extension of the bed.
When placed on short stakes their rounded rims create a little silhouette against seedlings. Over time the clay developed faint white efflorescence that looked like a soft patina, blending the markers into the seasonal rhythm of the garden.
Steps
- Take small terracotta pots and clean them of dust and loose particles.
- Write plant names on the pot underside or on a small card tucked below the rim.
- Mount the pots onto short stakes or place them inverted directly into soil.
- Allow the terracotta to weather naturally in the garden setting.
Copper pipe slugs with stamped initials and shine
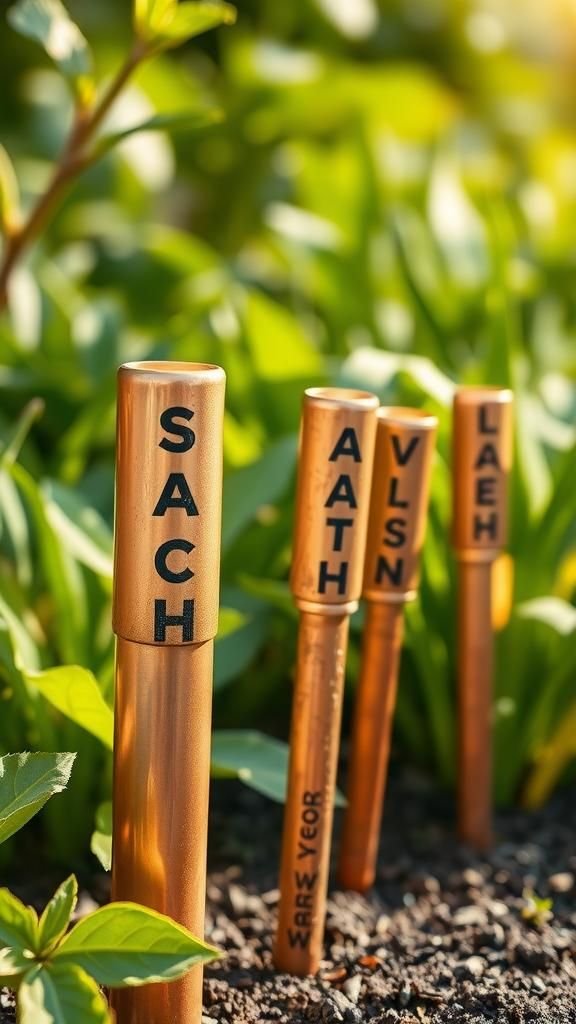
Short copper pipe pieces stand out like little industrial totems, their cylindrical silhouette catching both light and a faint metallic scent on warm days. I find the gleam of polished copper alongside soft lettuce especially pleasing, a contrast between tidy metal and unruly foliage.
Stamped initials or short names sink into the metal with a satisfying clarity and gain character as the copper darkens. The markers feel sturdy in wind and rain, small vertical accents that add a refined note to the otherwise soft textures of soil and leaves.
Steps
- Cut short lengths of copper pipe to desired marker height and smooth edges.
- Stamp plant initials or names into the pipe surface using metal stamps.
- Polish the pipe pieces and apply a protective lacquer if desired.
- Press the copper pipe segments vertically into the soil near labeled plants.
Polymer clay veggie icons on thin stakes
![]()
Tiny polymer clay icons shaped like vegetables feel charmingly illustrative, their bright colors and smooth finish giving them a toy-like quality. I remember pinching small carrots and radishes, the clay cool under my fingertips and forgiving when I smoothed edges.
When mounted on slender stakes they bob at plant edges, small mascots announcing what grows nearby. Their glossy surfaces stand up well to damp air, and the little faces or icons often elicit a laugh from visitors, a small handcrafted wink tucked into the garden rows.
Steps
- Model small vegetable or leaf icons from polymer clay and bake according to package instructions.
- Attach each baked icon to a thin wooden or metal stake with a strong adhesive.
- Optionally varnish the icons for extra weather protection.
- Place the stake-mounted icons into pots or beds beside the appropriate plants.
Old tile samples as durable garden markers
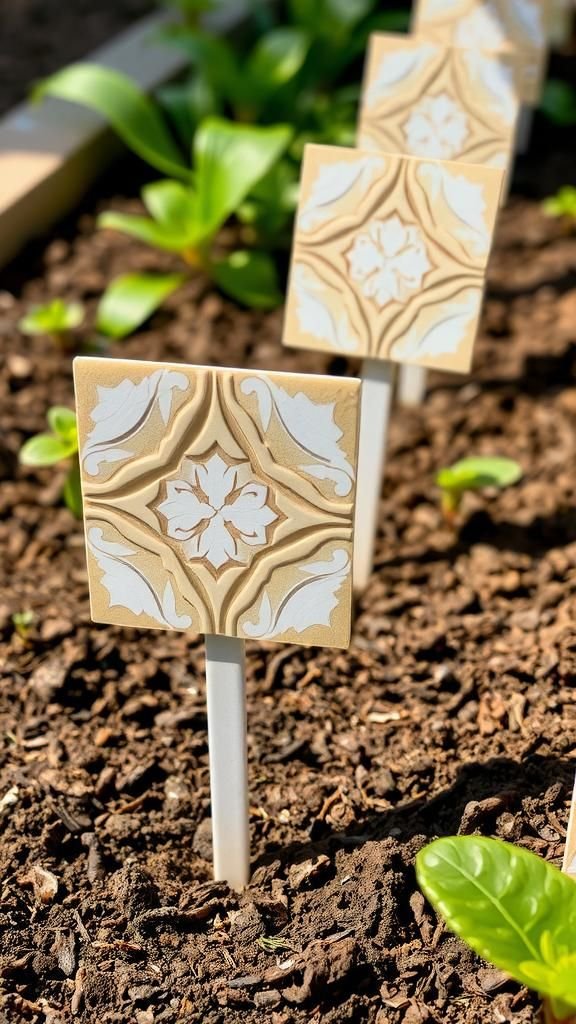
Rectangular tile samples with printed patterns take on a new role as garden markers, their glazed surfaces resilient and bright even after rain. I liked the clean, modern look they offered, a small contrast to the organic mess of soil.
Where I placed them, sunlight picked up the glossy finish and reflected a faint sheen across nearby leaves. The tiles felt surprisingly weighty, sitting low and steady against wind, and their printed patterns added a decorative touch that made beds look curated rather than improvised.
Steps
- Select ceramic or porcelain tile samples of appropriate size and smooth edges.
- Write plant names on the back with a permanent marker or adhesive label.
- Drive a short stake or mounting bracket to the tile and secure firmly.
- Place the mounted tiles into garden beds or large pots where they remain visible.
Cuttlefish bone tags for natural texture and charm
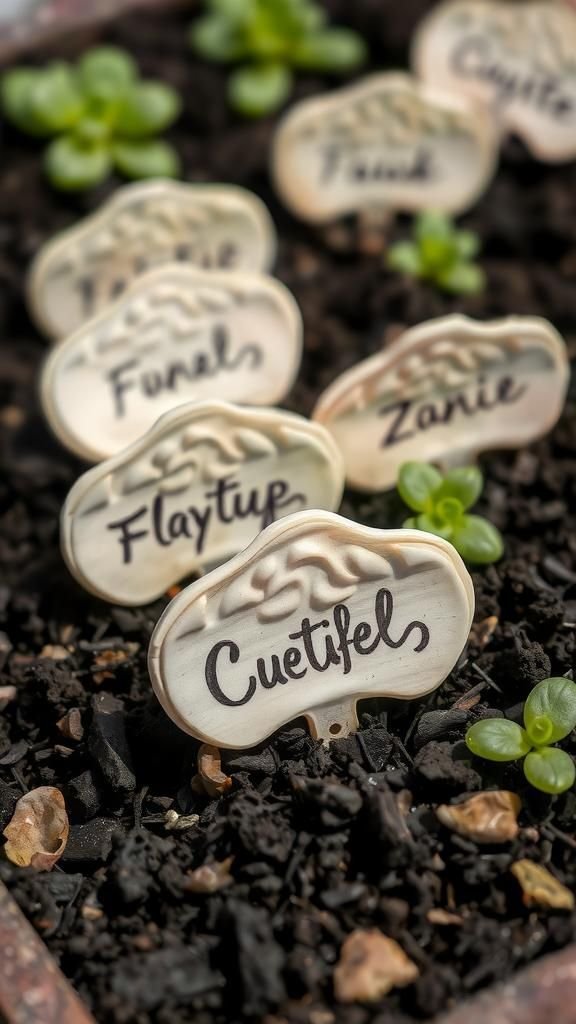
Cuttlefish bone has a velvety pale surface that looks delicate and almost lunar when placed in soil. I appreciated its light weight and the soft, slightly chalky sound when handled.
Names inscribed into its surface sat with a gentle depth and collected a dusty patina over time that melded with earth tones. The tags felt ephemeral and natural, almost like shells that landed among seedlings.
They created a quiet contrast with glossy leaves and dark soil, an understated marker that invited a second glance.
Steps
- Break cuttlefish bone into flat tag-sized pieces and sand any rough edges lightly.
- Write plant names into the surface using a pointed stylus or pen.
- Optionally coat with a thin breathable sealant to extend longevity.
- Place the tags gently into soil near corresponding plants.
Cork discs with pressed flower decorations
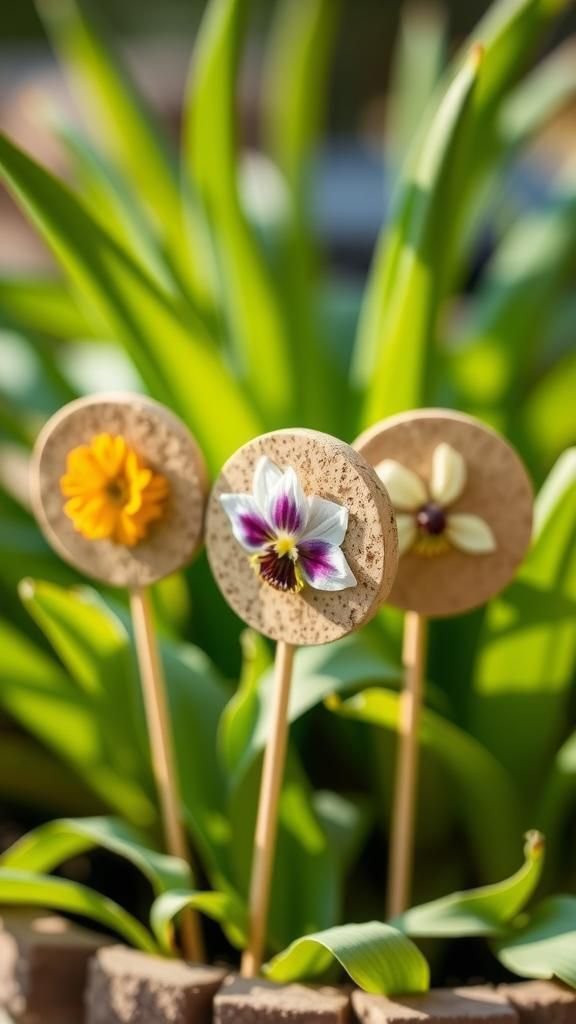
Round cork discs carry a warm, fibrous texture and absorb little flecks of soil that make them feel integrated into the garden. I loved arranging tiny pressed petals on their surfaces, the colors muted by time but still sweetly present.
When tied to stakes they sway slightly and leave faint shadows on pot rims. The cork’s matte brown tones provide a neutral frame for pale blossoms, and the overall effect reads like a small botanical keepsake placed at the edge of a bed for a private moment of delight.
Steps
- Glue small pressed flowers onto cork discs and allow adhesive to dry fully.
- Seal the decorated surface with a clear outdoor varnish to protect the flowers.
- Punch a hole and thread the cork onto twine or mount onto a stake.
- Place the cork disc markers near corresponding plants in pots or beds.
Pebbled mosaic markers with tiny grout lines
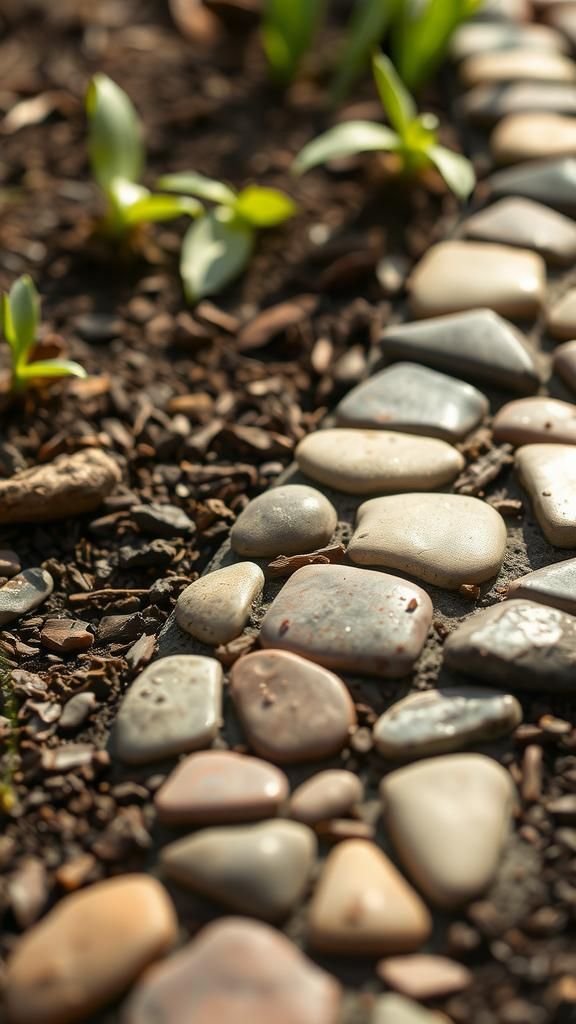
A pebbled mosaic surface feels soothingly organic, each smooth stone fitting with its neighbors into a small patterned whole. I enjoyed running my thumb across the tiny grout seams and watching dew settle into the crevices at dawn.
Laid flat at bed fronts they make a decorative border that also serves as a label, subtle and integrated. The muted tones of river stones and slate fragments sit naturally among foliage, offering a low, horizontal marker that reads like part of the garden’s ground language.
Steps
- Arrange small pebbles into a name or pattern on a sturdy base and bond with outdoor adhesive.
- Fill gaps with grout and wipe excess from pebble surfaces before it sets.
- Allow the mosaic to cure fully in a dry area.
- Place the finished pebbled marker flush with soil at the bed front.