Pressed flower art projects offer a beautiful way to preserve nature’s delicate beauty while creating stunning decorations. These 21 DIY pressed flower art projects include a variety of creative ideas to showcase your favorite blooms in unique, artistic ways.
Whether you’re a beginner or an experienced crafter, pressed flower art projects can add a touch of natural elegance to your home or gifts. I remember pressing flowers from my garden as a child and turning them into cards; that simple joy inspired me to explore more intricate pressed flower art projects over time.
Create Elegant Framed Pressed Flower Displays

Framed pressed flower displays turn delicate blooms into lasting wall art. By carefully arranging flowers on paper or fabric and placing them in a frame, you can create charming pieces that brighten any room.
This method highlights the natural colors and shapes of the flowers, preserving their beauty for years. These displays work well with a variety of flower types and sizes, making them a versatile project for any pressed flower enthusiast.
Steps:
- Select fresh flowers and press them until fully dried.
- Arrange the flowers on acid-free paper or fabric backing.
- Secure the arrangement with glue or double-sided tape.
- Place the artwork in a frame with glass to protect it.
- Hang the framed piece on a wall or shelf.
Design Unique Pressed Flower Greeting Cards
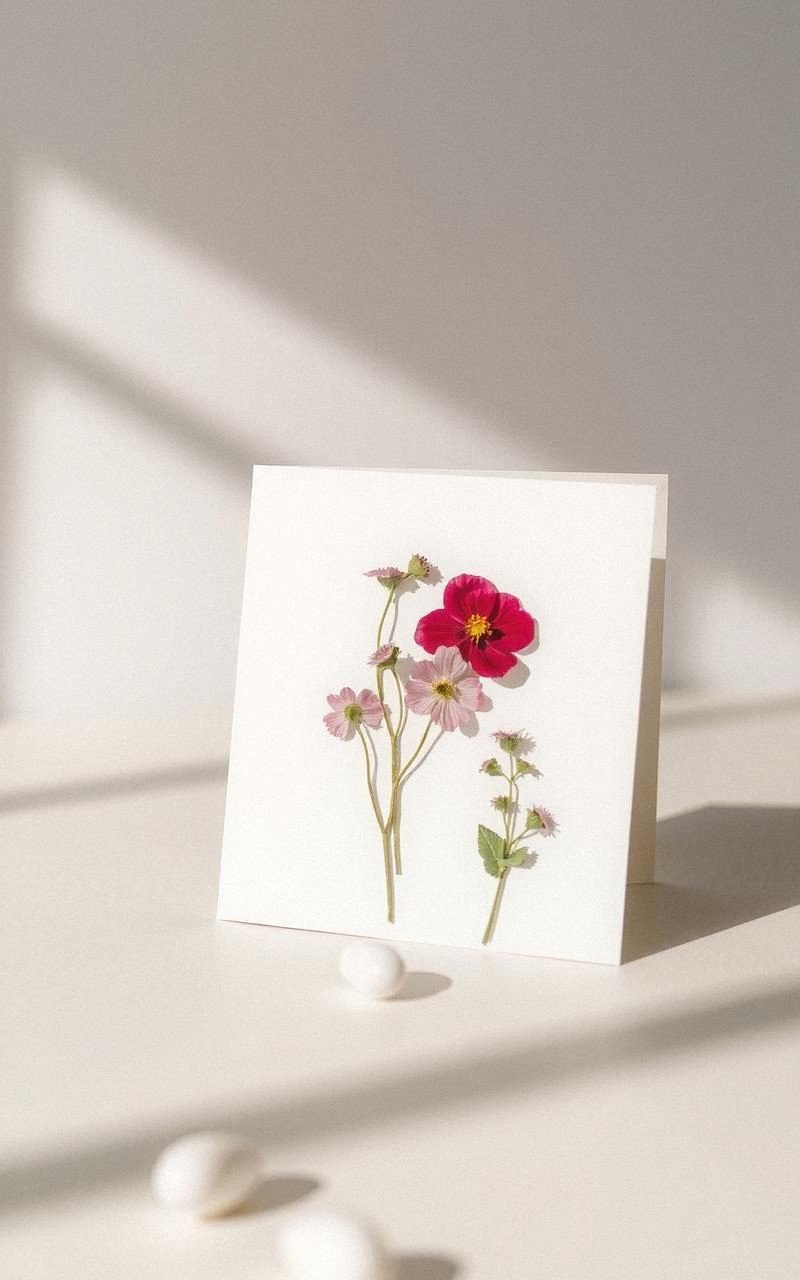
Pressed flower greeting cards bring a personal touch to special occasions. By attaching pressed flowers to blank cards, you create charming, handmade stationery perfect for birthdays, thank-yous, or just because.
The combination of natural elements and thoughtful messages makes these cards memorable and heartfelt. Experiment with different flower types and layouts to match the tone of your message.
Steps:
- Press flowers between heavy books or a flower press.
- Choose a blank card and arrange flowers on the front.
- Attach flowers with craft glue or double-sided tape.
- Allow glue to dry completely before handling.
- Write your message inside and send to loved ones.
Craft Beautiful Pressed Flower Bookmarks

Pressed flower bookmarks are a simple and practical way to enjoy floral art daily. Laminating pressed flowers onto cardstock creates durable bookmarks that brighten reading time.
This project is quick, fun, and ideal for gift-giving. You can customize each bookmark with different flower types and shapes to suit the reader’s personality.
Steps:
- Press flowers thoroughly until completely dry.
- Cut cardstock into bookmark-sized strips.
- Arrange flowers on the cardstock pieces.
- Seal the bookmarks using a laminator or clear adhesive sheets.
- Trim edges and punch a hole for adding a ribbon if desired.
Make Stunning Pressed Flower Resin Jewelry

Pressed flower resin jewelry captures nature’s charm in wearable art. Embedding tiny pressed flowers in clear resin creates unique necklaces, earrings, and bracelets.
This method preserves the flowers’ delicate details and adds a glossy finish. Resin jewelry offers a creative way to carry a piece of nature with you wherever you go.
Steps:
- Press small, flat flowers until dry.
- Prepare resin according to package instructions.
- Place flowers into silicone molds or bezels.
- Pour resin over flowers carefully to avoid bubbles.
- Allow resin to cure fully before removing jewelry pieces.
Create Decorative Pressed Flower Coasters

Pressed flower coasters combine functionality with botanical beauty. By embedding pressed flowers in resin or sealing them under glass coasters, you can craft charming table accessories.
These coasters protect surfaces while showcasing nature’s elegance, making them perfect conversation starters during gatherings.
Steps:
- Select and press flowers flat and dry.
- Arrange flowers on coaster bases or inside molds.
- Seal flowers with resin or waterproof adhesive.
- Let the coasters dry or cure completely.
- Use or gift the finished coasters.
Design Artistic Pressed Flower Wall Hangings

Pressed flower wall hangings add a natural accent to any space. Using fabric or paper as a base, arrange pressed flowers in creative patterns and mount them with clips or frames.
These lightweight hangings bring subtle botanical charm and can be customized to suit various decor styles.
Steps:
- Press a variety of flowers until fully dried.
- Arrange flowers on fabric or heavy paper backing.
- Attach flowers with glue or clear tape.
- Mount the backing onto a wooden frame or clip hanger.
- Hang on walls to enhance room decor.
Personalize Phone Cases with Pressed Flowers

Custom phone cases decorated with pressed flowers offer a unique blend of nature and technology. Using clear cases, carefully arrange and adhere dried flowers to create eye-catching designs.
Sealing the flowers protects them from damage while showcasing their beauty every day.
Steps:
- Press small flowers flat and dry.
- Clean the inside of a clear phone case.
- Arrange flowers on the inside surface of the case.
- Use clear-drying glue or resin to secure flowers.
- Allow to dry before using the phone case.
Assemble Lovely Pressed Flower Candle Holders

Pressed flower candle holders add a soft, romantic glow to any room. By attaching dried flowers to glass candle holders and sealing them, you create charming decor pieces.
The flickering candlelight highlights the intricate floral details, enhancing cozy atmospheres.
Steps:
- Press flowers flat and dry completely.
- Clean glass candle holders thoroughly.
- Attach flowers to the glass using clear adhesive.
- Seal flowers with a layer of clear varnish or resin.
- Allow to dry before placing candles inside.
Create Colorful Pressed Flower Wall Clocks

Pressed flower wall clocks combine function with floral art. Decorating a clock face with pressed flowers adds personality and charm.
This DIY project lets you customize timepieces to match your style while enjoying the natural beauty of dried blooms.
Steps:
- Press a variety of flowers and let dry.
- Remove the clock face from its frame.
- Arrange flowers on the clock face with glue.
- Seal with clear varnish or resin for protection.
- Reassemble the clock and hang it up.
Design Unique Pressed Flower Notebooks
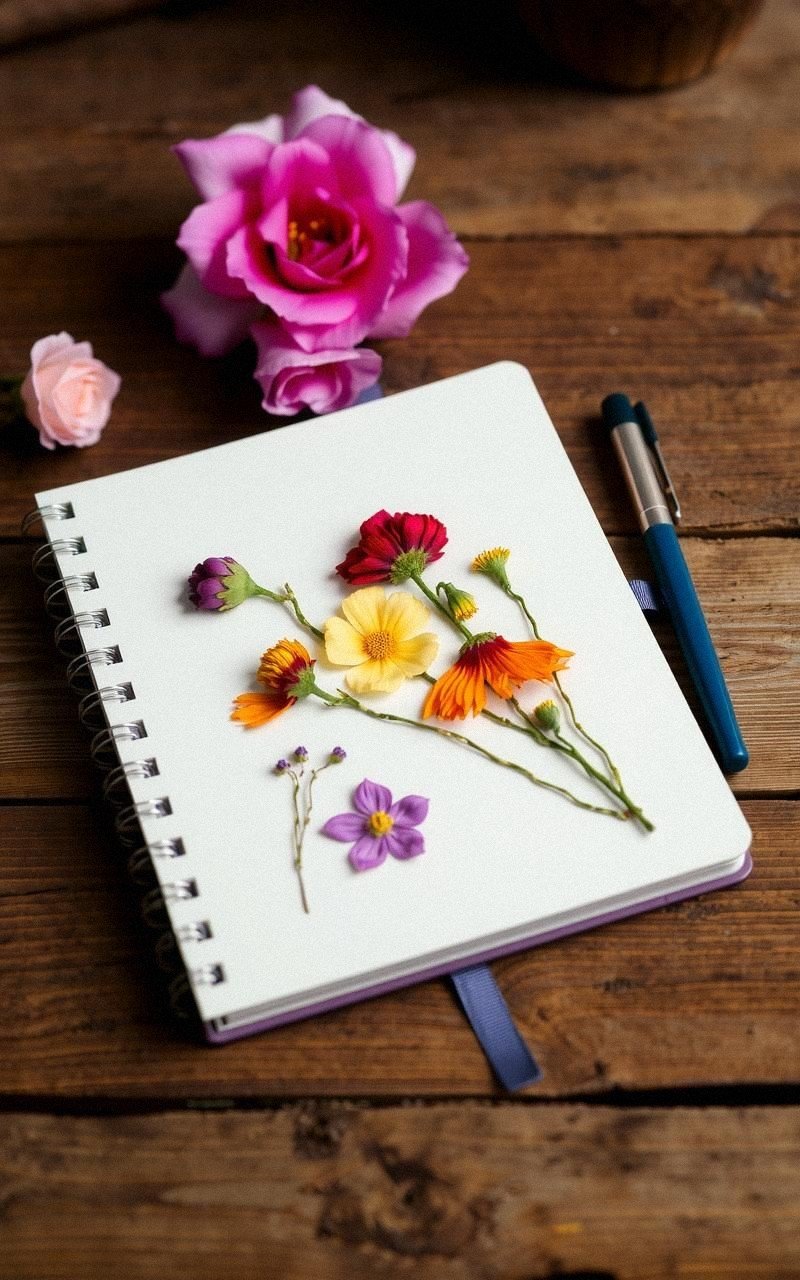
Pressed flower notebooks make beautiful journals or gifts. Gluing dried flowers onto notebook covers adds a personal, artistic flair.
Sealing the flowers protects them from wear and turns plain notebooks into treasured keepsakes.
Steps:
- Press flowers flat and dry.
- Arrange flowers on the notebook cover.
- Attach flowers using craft glue.
- Seal with clear adhesive or varnish.
- Allow drying before using the notebook.
Make Charming Pressed Flower Magnets

Pressed flower magnets brighten up refrigerators and magnetic boards with natural beauty. Small pressed flowers attached to magnet backs create decorative accents for kitchens and offices.
This quick project is perfect for using tiny blooms creatively.
Steps:
- Press small flowers completely dry.
- Cut small backing pieces for each flower.
- Glue flowers onto the backing.
- Attach magnet strips or discs to the back.
- Let the glue dry before using magnets.
Produce Elegant Pressed Flower Wall Art Collages

Pressed flower collages bring diverse blooms together in artistic compositions. Layering and arranging flowers on canvas or paper creates textured, eye-catching wall art.
This project encourages experimentation with color and form for a truly personal piece.
Steps:
- Press a wide range of flowers.
- Select a canvas or heavy paper backing.
- Arrange flowers in a collage pattern.
- Secure with craft glue or adhesive spray.
- Frame or mount the finished collage.
Build Decorative Pressed Flower Terrariums
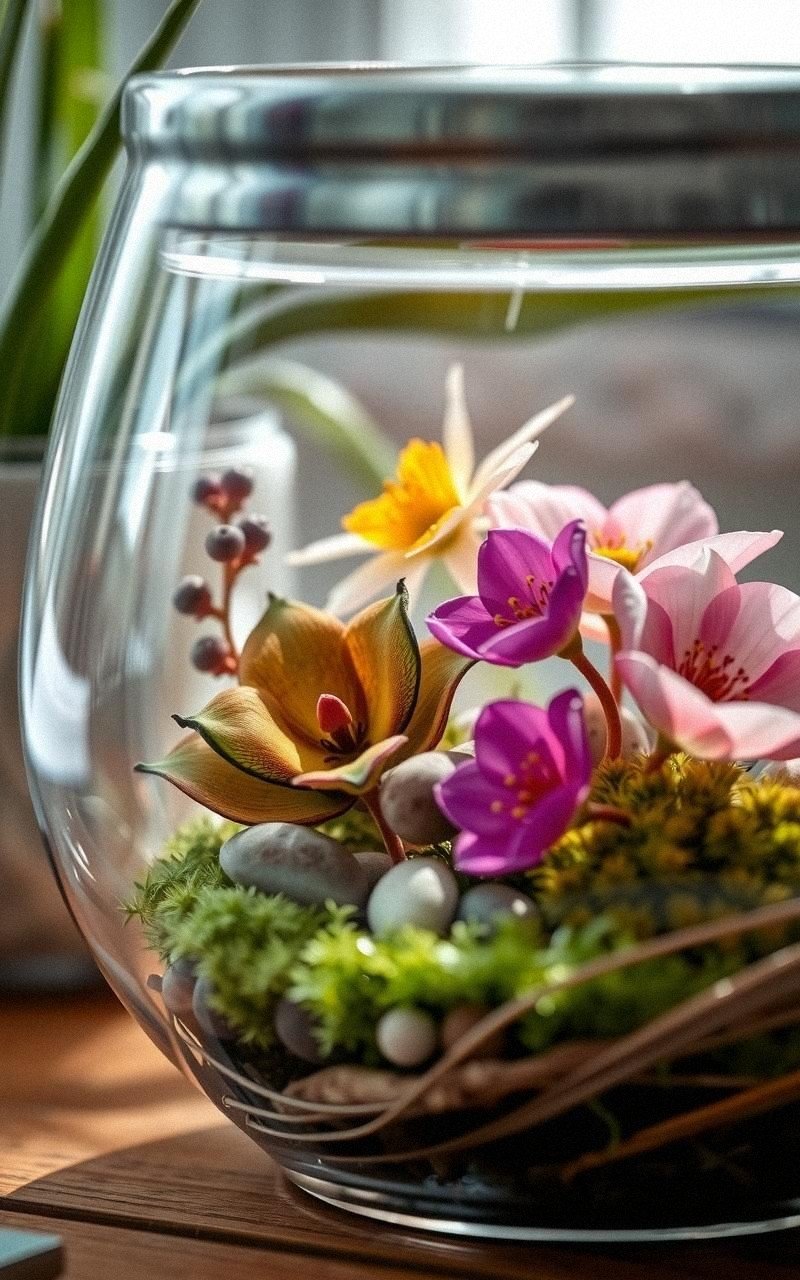
Pressed flower terrariums offer a fresh twist on traditional terrariums by featuring dried blooms inside glass containers. Layering pressed flowers with moss or stones creates a delicate, lasting display that celebrates preserved nature in a contained space.
Steps:
- Press thin flowers until completely dry.
- Select a clear glass terrarium or jar.
- Place a base layer of moss or stones.
- Arrange pressed flowers inside carefully.
- Seal or leave open depending on the container.
Design Beautiful Pressed Flower Gift Tags

Pressed flower gift tags add a charming handmade touch to presents. Attaching tiny pressed flowers to cardstock tags creates a natural, elegant accent.
These tags are easy to customize and perfect for any occasion, enhancing the presentation of your gifts.
Steps:
- Press small flowers fully dry.
- Cut cardstock into tag shapes.
- Arrange and glue flowers onto tags.
- Punch holes and add string or ribbon.
- Attach to gifts for a personal touch.
Assemble Creative Pressed Flower Sun Catchers

Pressed flower sun catchers transform sunlight into colorful displays. By sandwiching dried flowers between glass or acrylic sheets, you create translucent art pieces that glow when hung in windows.
These sun catchers add warmth and cheer to any room.
Steps:
- Press flowers flat and dry.
- Place flowers between two clear glass or acrylic sheets.
- Seal edges with waterproof glue or frame.
- Attach a string or ribbon for hanging.
- Hang in a sunny window to catch light.
Create Artistic Pressed Flower Envelopes

Pressed flower envelopes make mail extra special. Decorating envelopes with dried flowers adds charm and personality to your letters or invitations.
Sealing the flowers protects them during mailing, making your correspondence truly memorable.
Steps:
- Press flowers until thoroughly dry.
- Arrange flowers on the envelope surface.
- Attach with craft glue carefully.
- Seal with a clear adhesive or tape.
- Allow to dry before mailing.
Make Stunning Pressed Flower Lampshades

Pressed flower lampshades create a soft, natural glow in any room. By adhering dried flowers to translucent lampshade surfaces, you produce warm, floral patterns illuminated when the lamp is on.
This project adds a unique botanical touch to lighting.
Steps:
- Press flowers flat and dry.
- Clean and prepare a plain lampshade.
- Glue flowers evenly around the shade.
- Seal with a clear adhesive or decoupage medium.
- Allow to dry before using the lamp.
Design Unique Pressed Flower Scrapbook Pages

Pressed flower scrapbook pages preserve memories with natural beauty. Adding pressed flowers to scrapbook layouts enriches photos and journaling with texture and color.
This approach personalizes scrapbooks and celebrates special moments creatively.
Steps:
- Press flowers thoroughly dry.
- Plan scrapbook page layout.
- Glue flowers alongside photos and notes.
- Allow glue to dry completely.
- Add protective sheet or cover.
Craft Lovely Pressed Flower Picture Frames

Pressed flower picture frames offer charming borders for your favorite photos. By gluing dried flowers onto frame edges and sealing them, you create unique photo displays filled with natural elegance.
These frames make heartfelt gifts or home decor accents.
Steps:
- Press flowers flat and dry.
- Select plain picture frames.
- Arrange and glue flowers on frame edges.
- Seal with clear varnish or resin.
- Allow to dry before adding photos.
Assemble Mini Pressed Flower Shadow Boxes

Mini pressed flower shadow boxes create delicate, three-dimensional displays. Layering dried flowers inside shadow boxes adds depth and interest, preserving floral beauty in a compact, decorative form.
These boxes make lovely keepsakes or gifts.
Steps:
- Press flowers completely dry.
- Choose small shadow boxes.
- Arrange flowers inside with glue or pins.
- Seal the box securely.
- Display on shelves or walls.
Make Elegant Pressed Flower Wall Calendars
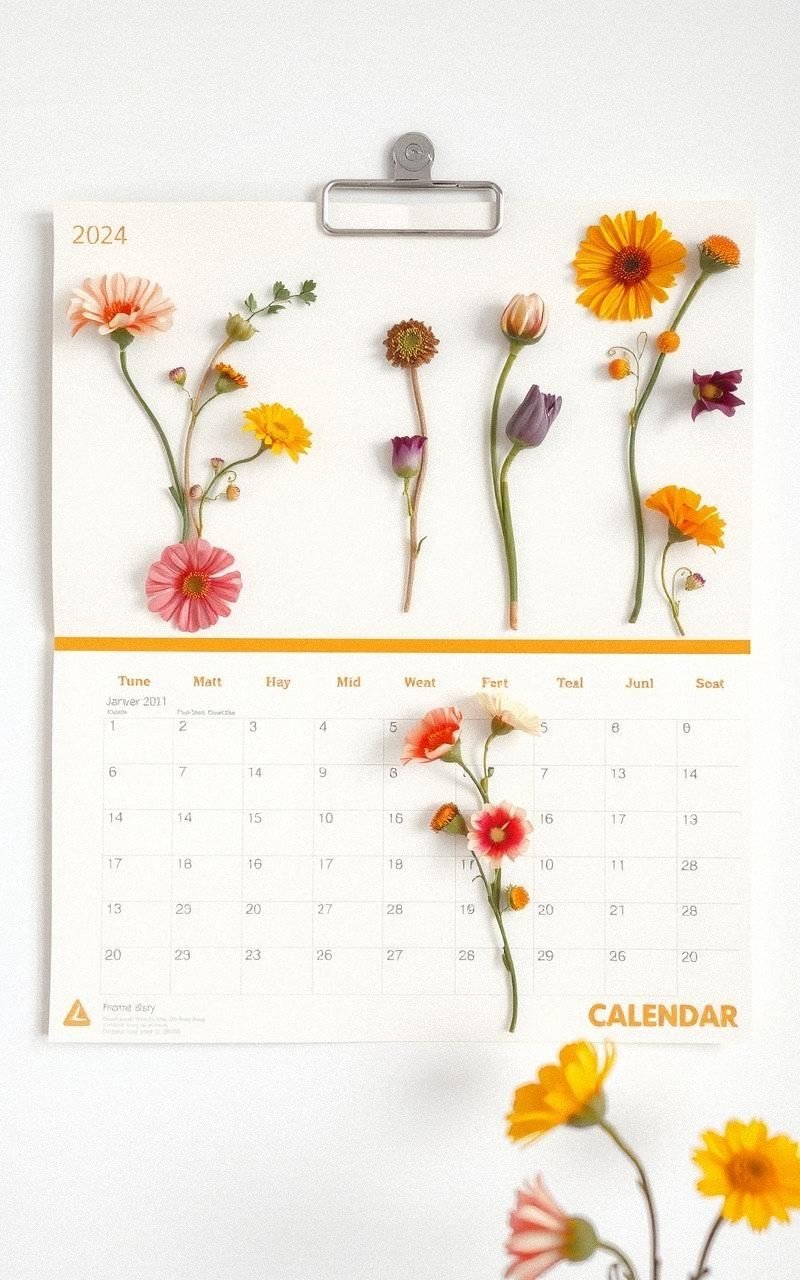
Pressed flower wall calendars combine function with floral art. Decorating each month’s page with seasonal pressed flowers adds charm and freshness.
This project turns practical calendars into beautiful decorations you’ll enjoy year-round.
Steps:
- Press flowers representing each season.
- Print or select calendar pages.
- Glue flowers onto corresponding months.
- Seal pages with clear adhesive or laminate.
- Hang calendar for display.