DIY concrete craft projects offer a unique way to combine creativity with durability. Whether you’re a beginner or have some experience, these 21 DIY concrete craft projects can add a modern, industrial touch to your home or garden.
Concrete crafts are versatile, allowing you to create everything from decorative planters to chic candle holders. I remember the first time I tried a simple concrete coaster project—it was surprisingly relaxing and rewarding to see the solid, smooth finish come to life.
These projects will inspire you to experiment with concrete and bring a personal flair to your space.
Modern Geometric Concrete Planters For Succulents

Create stylish geometric concrete planters perfect for succulents or small plants. These planters add an industrial yet elegant vibe to any room or garden.
Using simple molds, you can produce multiple shapes like hexagons, triangles, or cubes. The raw texture of concrete contrasts beautifully with the greenery, making your plants stand out.
These planters are durable, lightweight, and can be painted or left natural for a minimalist look.
Steps:
- Mix concrete with water to a thick consistency.
- Pour the mixture into geometric molds.
- Insert a small container inside to form the plant cavity.
- Allow concrete to cure for 24-48 hours.
- Remove molds and sand rough edges.
- Optionally, paint or seal the surface.
- Place soil and your favorite succulent inside.
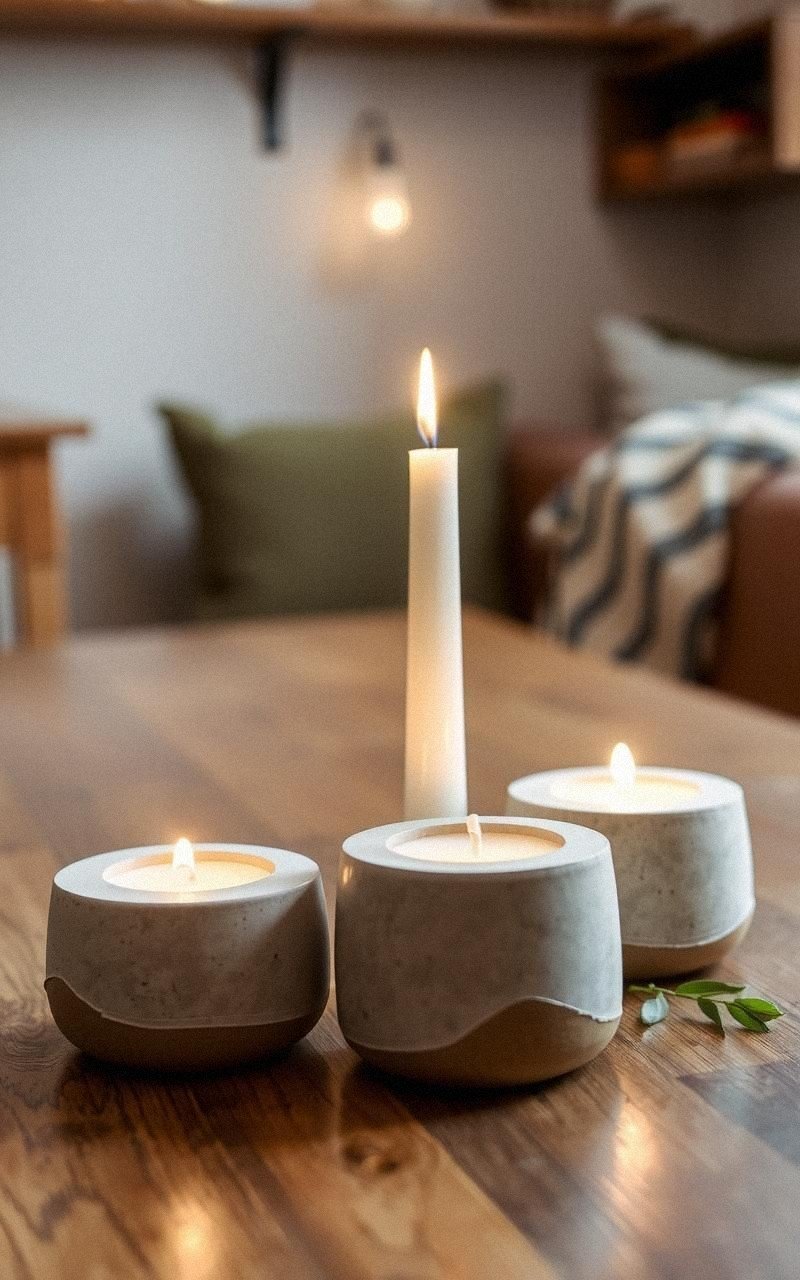
DIY Concrete Candle Holders With Minimalist Design

Craft elegant concrete candle holders that bring a minimalist touch to your decor. These holders can be made in various shapes such as cylinders, cubes, or spheres.
The concrete’s cool tone complements candles of all colors and styles. Making these holders involves using simple molds and allowing the concrete to cure properly.
They are great for creating a cozy atmosphere inside your home or outdoors during evening gatherings.
Steps:
- Prepare your concrete mix with the right water ratio.
- Pour into silicone molds shaped for candles.
- Insert a candle or create a hole to fit one later.
- Let the concrete dry for at least 48 hours.
- Remove from molds carefully.
- Sand any rough areas for a smooth finish.
- Place candles and enjoy your new holders.
Textured Concrete Coasters With Custom Stamps

Make textured concrete coasters with personalized stamps or patterns for a one-of-a-kind touch. These coasters protect surfaces while adding artistic flair.
You can use rubber stamps, leaves, or lace to imprint designs onto wet concrete. The process is simple and allows you to experiment with various textures and colors by adding pigments to the concrete mix.
These coasters make great gifts or additions to your coffee table.
Steps:
- Mix concrete with pigment if desired.
- Pour into flat coaster molds.
- Press stamps or textured items onto wet concrete.
- Smooth edges with a trowel and let cure for 2 days.
- Remove molds and gently clean the surface.
- Apply sealant if needed to protect the design.
Concrete Jewelry Dishes With Polished Edges

Design concrete jewelry dishes that offer a chic way to organize rings and small accessories. These shallow dishes can be molded in various shapes and polished for a smooth edge.
Adding color pigments or metallic paints enhances their beauty. The heavy yet compact nature of concrete makes these dishes stable and stylish.
They are perfect bedside or vanity companions.
Steps:
- Mix concrete with water until smooth.
- Pour into shallow molds or bowls.
- Allow concrete to partially set, then smooth edges with sandpaper.
- Cure for 48 hours before removing from molds.
- Polish edges with finer sandpaper for a sleek finish.
- Optionally, paint or seal to add color or shine.
DIY Concrete Bookends With Bold Shapes

Create sturdy concrete bookends in bold shapes to keep your books organized with style. These bookends provide excellent weight and complement industrial or modern decor themes.
Using molds shaped like triangles, rectangles, or abstract forms, you can customize colors and finishes. These bookends also make wonderful handmade gifts for book lovers.
Steps:
- Prepare concrete mix with water.
- Pour concrete into bookend molds with desired shapes.
- Insert a weight or reinforcement if needed.
- Let cure fully for 48-72 hours.
- Remove from molds and sand any sharp edges.
- Paint or seal to protect and decorate.
Personalized Concrete Nameplates For Doors

Make personalized concrete nameplates that add a unique touch to your front door or office. With stencils or hand-carved impressions, you can customize the text and design.
Concrete’s durability ensures the nameplate withstands weather if used outdoors. You can also add color accents or metallic paints to highlight the lettering.
These nameplates are both functional and decorative.
Steps:
- Mix concrete and pour into a flat rectangular mold.
- Before curing, press stencil letters or carve your design.
- Allow concrete to set for at least 48 hours.
- Remove mold and clean edges.
- Paint letters or seal the entire plate.
- Attach to door with adhesive or screws.
Concrete Wall Hooks With Embedded Metal Rods

Craft concrete wall hooks by embedding metal rods for durability and style. These hooks are perfect for hanging coats, bags, or towels.
The combination of concrete and metal creates a modern industrial look. You can shape the concrete into blocks or abstract forms and insert rods before the concrete cures.
Once hardened, the hooks can be mounted securely on walls.
Steps:
- Mix concrete and pour into molds shaped like hooks or blocks.
- Insert metal rods into the wet concrete at desired angles.
- Let cure completely for 48 hours.
- Remove from molds and sand rough surfaces.
- Attach mounting hardware if needed.
- Install hooks on wall.
DIY Concrete Garden Stepping Stones With Impressions

Design garden stepping stones by imprinting leaves, stones, or patterned mats into wet concrete. These stones provide a practical and decorative path through your garden.
The impressions add texture and natural beauty, blending seamlessly with outdoor surroundings. You can create various shapes and sizes, making each stepping stone unique and charming.
Steps:
- Mix concrete to a thick consistency.
- Pour into shallow molds or frame on the ground.
- Press natural objects or textured mats into wet concrete.
- Allow to cure for 48 hours.
- Remove molds and clean edges.
- Place stones along your garden path.
Minimalist Concrete Desk Organizers For Stationery

Make minimalist concrete desk organizers that keep pens, clips, and small office supplies tidy. These compact organizers can have multiple compartments and sleek shapes.
Concrete adds weight and a modern aesthetic to your workspace. You can customize the color or leave the natural gray finish for a clean look.
These organizers help boost productivity by decluttering your desk.
Steps:
- Mix concrete and pour into compartmentalized molds.
- Allow concrete to cure for 48 hours.
- Remove mold and smooth rough edges.
- Optional: paint or seal the organizer.
- Place on your desk and fill with stationery.
Concrete Tealight Holders With Rustic Finish
Craft concrete tealight holders with a rustic, textured finish for a cozy atmosphere. These holders add charm to any table setting or shelf.
Using textured molds or rough sanding techniques creates an aged look. You can make holders in various shapes and sizes to fit tealights perfectly.
Their weight and texture make them safe and stylish candle accessories.
Steps:
- Mix concrete and pour into small tealight molds.
- Use textured molds or add grit to the surface.
- Let cure completely for 48 hours.
- Remove from molds and lightly sand edges.
- Place tealights inside and enjoy the ambiance.
DIY Concrete Phone Stand With Sleek Angles

Build a sleek concrete phone stand with angled supports to hold your device upright. This stand is perfect for desks or bedside tables, combining function with a modern look.
By using simple molds, you can create a sturdy stand with a smooth finish. Adding pigment or paint enhances its style.
This project is quick and practical for concrete craft beginners.
Steps:
- Mix concrete and pour into an angular mold.
- Smooth the surface and let it cure for 48 hours.
- Remove mold and sand for a polished finish.
- Optionally, paint or seal the surface.
- Place your phone on the stand.
Colorful Concrete Magnets With Bold Shapes

Create colorful concrete magnets shaped into circles, squares, or abstract forms. Adding pigments to the concrete mix lets you produce vibrant hues that stand out on any fridge or magnetic surface.
Attach small magnets to the back with strong glue. These magnets are fun, functional, and allow endless color and shape combinations for your kitchen or office.
Steps:
- Mix concrete with chosen color pigments.
- Pour into small molds of desired shapes.
- Cure for at least 24 hours.
- Remove from molds and smooth edges.
- Glue magnets to the back securely.
- Let glue dry before use.
DIY Concrete Key Holders With Embedded Hooks
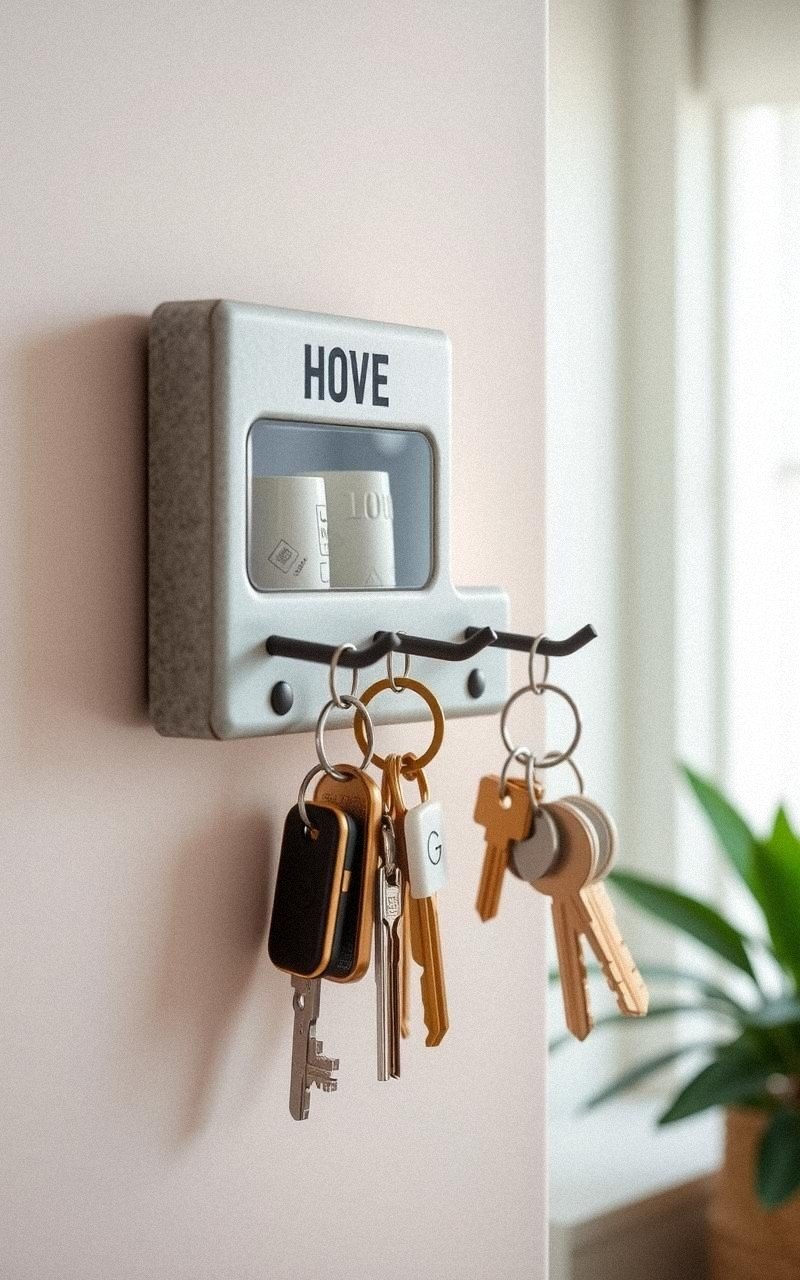
Make concrete key holders by embedding small hooks into the hardened material. These holders can be wall-mounted and keep your keys organized stylishly.
Using rectangular or abstract molds, you can customize sizes and shapes. The concrete surface can be painted or left natural.
This project combines practicality with a raw, industrial aesthetic.
Steps:
- Pour concrete into the chosen mold.
- Insert small metal hooks into the wet concrete at the front.
- Allow concrete to cure for 48-72 hours.
- Remove from mold and smooth edges.
- Mount on the wall using screws or adhesive.
DIY Concrete Plant Markers With Handwritten Labels

Design concrete plant markers by casting thin slabs and writing plant names by hand or with stamps. These markers help organize your garden or indoor plants with style.
You can personalize each marker with colors or textures. Concrete’s weather resistance makes these markers long-lasting outdoors.
This is a simple way to add charm and function to your gardening routine.
Steps:
- Mix concrete and pour into flat, thin molds.
- Let the concrete cure overnight.
- Write or stamp plant names on the surface.
- Seal the markers with outdoor sealant.
- Place them in your garden or pots.
Concrete Hanging Planters With Leather Straps

Create concrete hanging planters paired with leather straps for a natural-industrial look. The concrete pots are sturdy and complement the warm leather.
These planters are perfect for small trailing plants or herbs. Using simple molds and attaching straps after curing, you can hang them indoors or outdoors to decorate any space with greenery and texture.
Steps:
- Pour concrete into round or oval molds.
- Let cure fully for 48 hours.
- Remove molds and sand rough areas.
- Attach leather straps with holes and rivets.
- Fill with soil and plants.
- Hang in desired location.
DIY Concrete Trivets With Colorful Inlays

Make concrete trivets enhanced with colorful inlays such as resin or tile pieces. These trivets protect surfaces from hot pots while adding artistic flair.
You can embed small colorful elements into wet concrete for a unique pattern. Once cured, the trivet is durable and practical with a splash of color that brightens your kitchen or dining area.
Steps:
- Mix concrete and pour into flat trivet molds.
- Place colorful inlays or resin pieces on the wet surface.
- Allow to cure for 48 hours.
- Remove from molds and sand edges.
- Seal the trivet if needed to protect colors.
- Use under hot cookware.
Concrete Desk Clock With Minimalist Dial
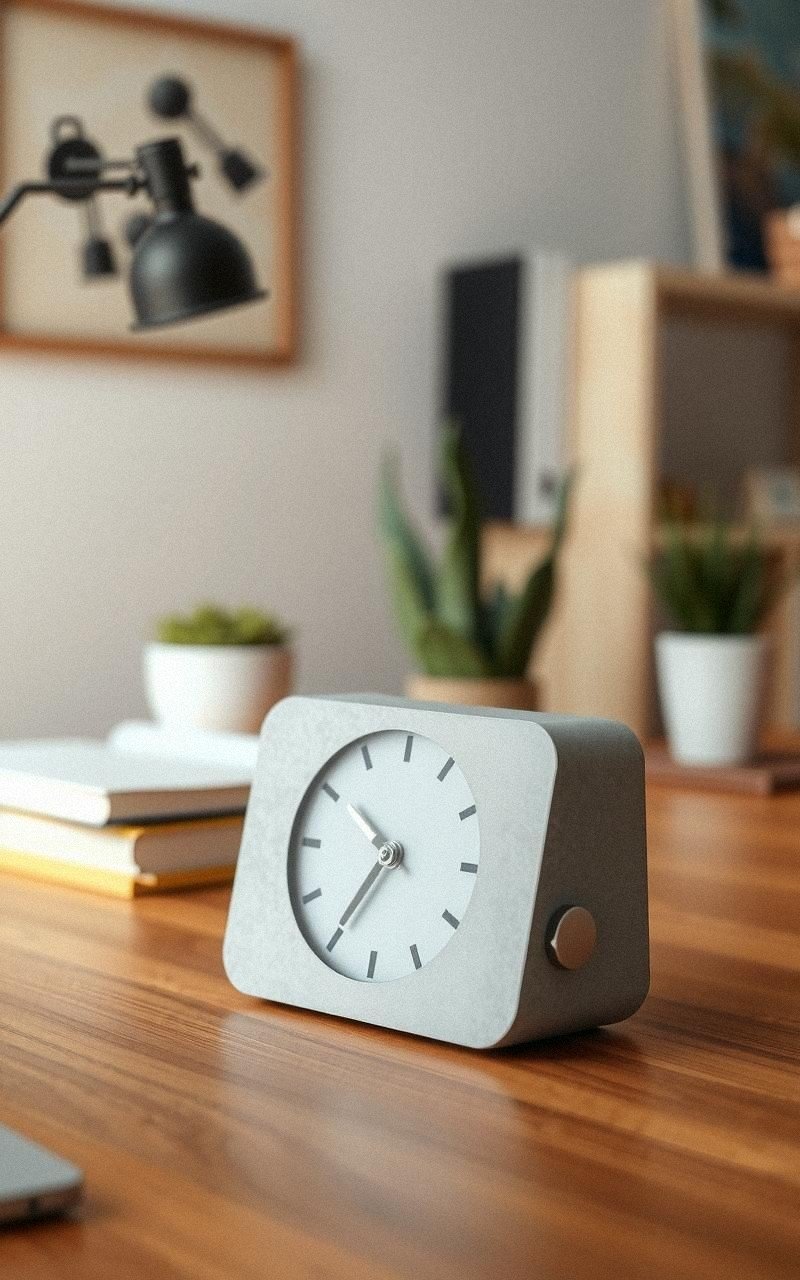
Design a concrete desk clock featuring a minimalist dial and simple hands. The clock’s base is made from cast concrete, offering a sturdy and stylish look.
You can paint the numbers or use metallic accents for the dial. This project combines functionality and modern design, perfect for any workspace or living area.
Steps:
- Cast concrete into a circular mold for the clock base.
- Let it cure completely for 48 hours.
- Attach clock mechanism and hands to the center.
- Paint numbers or markers if desired.
- Set the time and place on your desk.
DIY Concrete Soap Dish With Drainage Holes

Create a practical concrete soap dish featuring drainage holes to keep soap dry and clean. This dish can be molded in a shallow rectangular or oval shape.
The texture of concrete adds grip, while the holes prevent water buildup. You can smooth the surface or leave it raw for a rustic look.
This soap dish is a durable accessory for bathrooms or kitchens.
Steps:
- Mix concrete and pour into a shallow soap dish mold.
- Before curing, create drainage holes using a stick or tool.
- Allow concrete to cure for 48 hours.
- Remove from mold and sand edges.
- Place soap and use in your bathroom or kitchen.
Concrete Picture Frames With Clean Lines

Craft concrete picture frames with clean, straight lines for a modern look. These frames provide a sturdy border for photos or art prints.
You can make molds from wood or silicone and paint or seal the finished frame. The cool tone of concrete contrasts beautifully with warm photos, making your memories stand out on walls or shelves.
Steps:
- Build or buy a frame mold with clean edges.
- Pour concrete mixture into the mold.
- Let cure for 48 hours.
- Remove mold and smooth edges with sandpaper.
- Paint or seal the frame if desired.
- Insert photo and display.
DIY Concrete Desk Pen Holders With Multiple Compartments
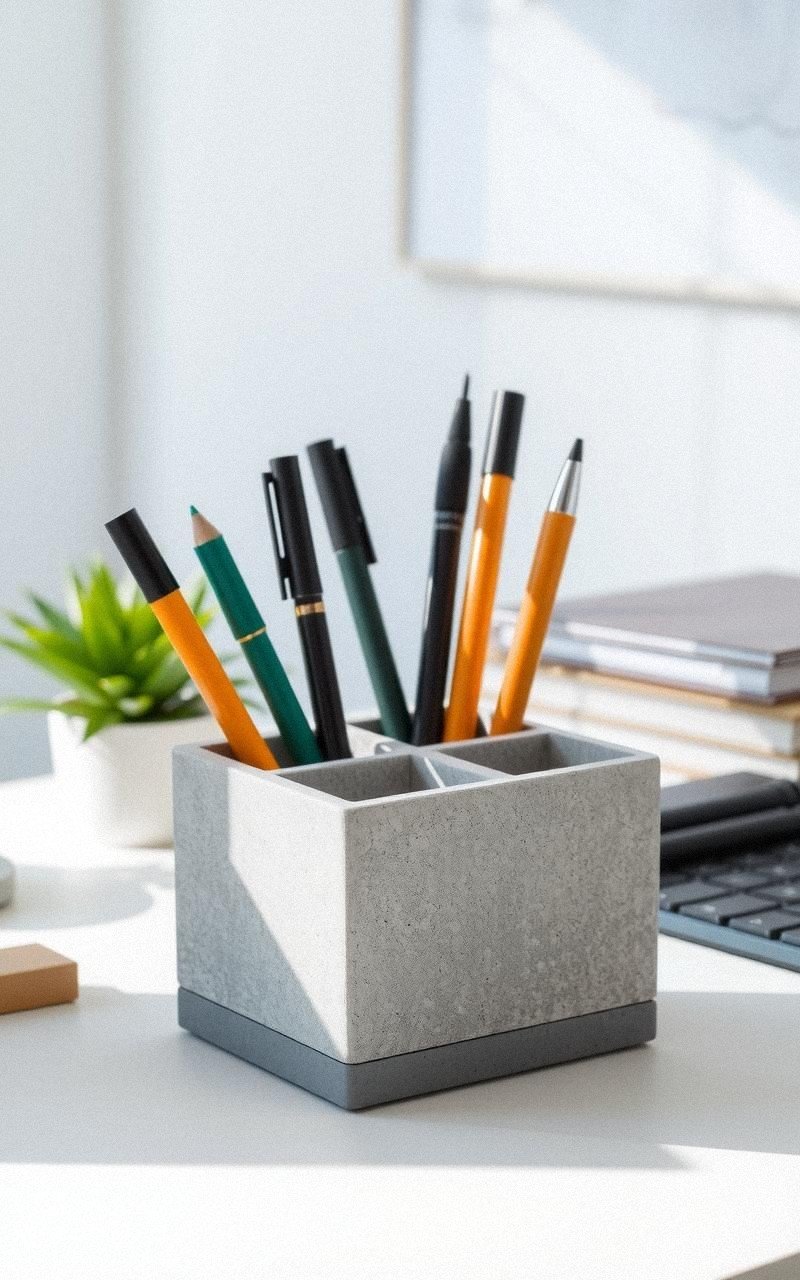
Design functional concrete pen holders featuring multiple compartments for pens, pencils, and small tools. These holders add a sturdy and stylish element to your workspace.
Using molds with sections, you can create organized storage with a modern vibe. The raw concrete texture makes each piece unique and tactile to the touch.
Steps:
- Mix concrete and pour into a multi-compartment mold.
- Smooth the surface and let cure for 48 hours.
- Remove from mold and sand any rough spots.
- Optionally paint or seal the holder.
- Fill compartments with stationery items.
Concrete Decorative Bowls With Embedded Stones
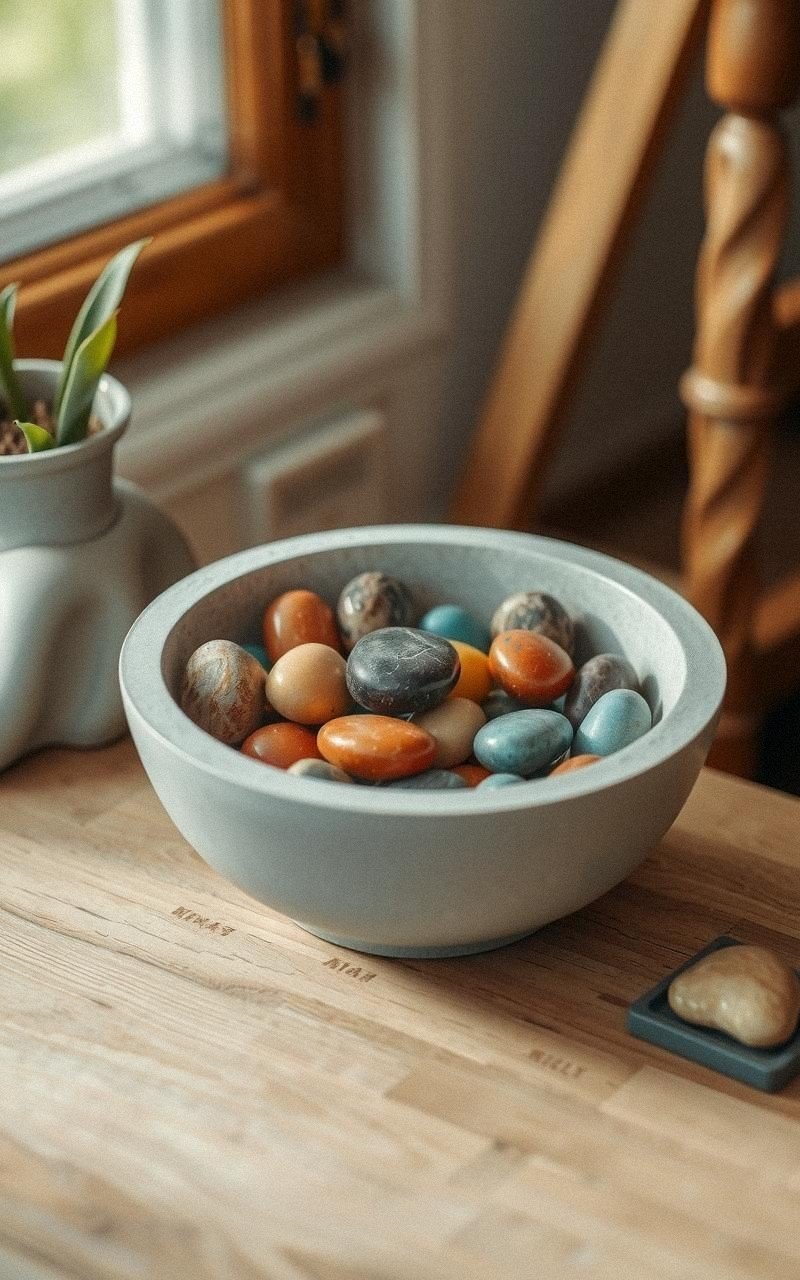
Create decorative concrete bowls embedded with colorful stones or glass pieces for an eye-catching effect. These bowls serve as catch-alls or centerpiece accents.
The embedded stones add texture and color, contrasting nicely with the gray concrete. You can polish the inside for smoothness or leave it rough for rustic charm.
Steps:
- Mix concrete and pour into bowl-shaped molds.
- Press stones or glass pieces into the wet concrete surface.
- Let cure for 48 hours.
- Remove molds and sand edges if needed.
- Use as decorative bowls or holders.