Inspired by a nostalgic treat, this cocoa swirl log layers airy cocoa sponge with fluffy cream filling and a glossy fudge glaze. Decadent and captivating, the elegant spiral may charm you into cutting yet another piece. Your stomach is calling… louder… louder…
I get a lot of joy out of reinventing classic childhood snacks—the kind that once felt like a special surprise tucked into a school lunch. Crafting homemade versions of those old favorites—think spiced toaster pastries, tiny iced animal cookies, marshmallow cereal bars, chocolate cupcakes with creamy centers, and the ever-loved oatmeal sandwich pies—is especially satisfying. They don’t just stir up warm memories; the from-scratch versions almost always taste richer, fresher, and more delightful than anything from a box. This rolled chocolate sponge cake—often known as a Swiss Roll, Ho Ho, or Yodel—is yet another blast from the past.
For this chocolate Swiss roll, a number of people mentioned that their sponge turned out crumbly, split apart while being rolled, or lacked a strong cocoa taste. Whenever I notice repeated feedback pointing to similar difficulties, I go back to the kitchen, test adjustments, and refine the method until I’m satisfied that the problems have been resolved.
You’ll find the revised dish written underneath. It reminds me of a rolled sponge dessert I experimented with extensively last year, which I’ve included in my upcoming book. The taste profile is unique here, yet I encountered comparable hurdles during its creation.
Following countless batches of testing, I’m thrilled to share that this chocolate Swiss roll has reached its best version yet! The revised formula features some subtle adjustments, such as replacing melted butter with oil and incorporating buttermilk, both of which create a softer, more tender cake texture.

Essential Components for a Cocoa Sponge Dessert:
- Flour Base (Cake or Plain): Either type works well here. After numerous trials, we confirmed both yield the same outcome.
- Cocoa (Unsweetened): Choose between natural cocoa or Dutch-style; both are perfectly suitable.
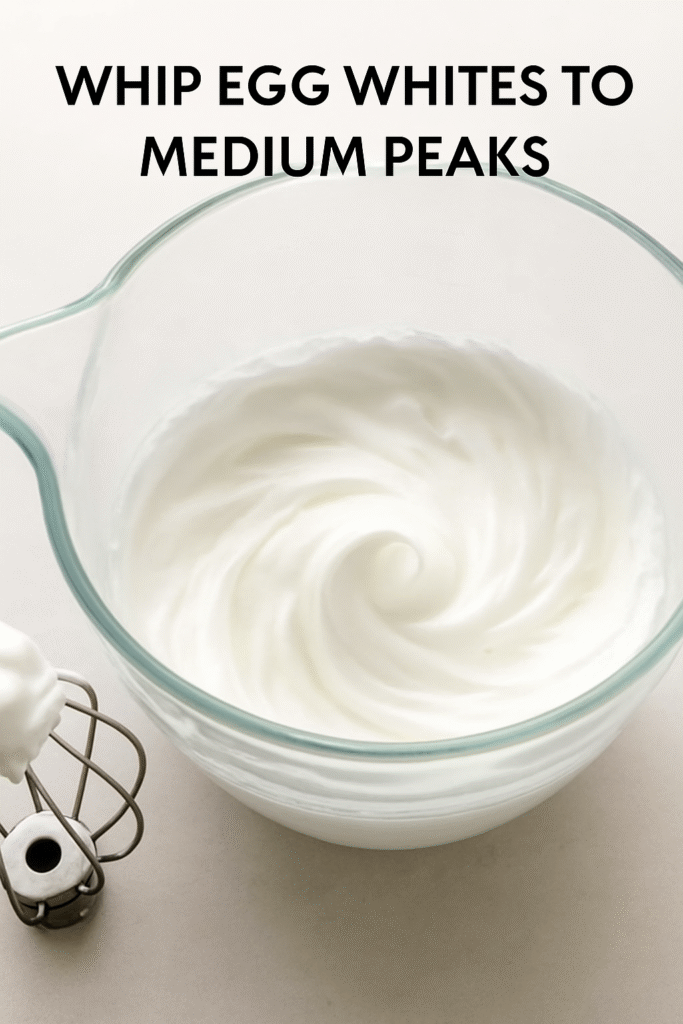
- Eggs (Divided): These are the backbone of the cake, giving stability and hydration. You’ll need four eggs, with whites whipped to soft–medium peaks to fold in airy volume.
- Neutral Oil: To prevent dryness, this recipe relies on oil rather than butter. It keeps the sponge tender and evenly moist, much like in extra-soft chocolate cupcakes.
- Buttermilk (or Whole Milk): Adds richness and keeps the crumb smooth. If buttermilk isn’t available, regular whole milk can replace it.
- Espresso Powder (Optional): A touch enhances the depth of the chocolate, without imparting a coffee taste.
Step-by-Step
Gather several mixing containers, a fine strainer, and either a handheld beater or a countertop mixer equipped with a whisk tool.
Beat the egg whites with part of the sugar until they form soft-to-medium peaks. Expect this to require around four to five minutes—possibly longer in damp or humid weather. If it seems slow, just stay patient and continue whisking until the texture is right.
Whisk together yolks and the leftover sweetener in a separate dish, then mix in vanilla extract, vegetable oil, cultured milk, and instant coffee powder.
Next, carefully incorporate the whipped egg whites in two stages, taking care not to collapse the airy mixture. The blend should appear frothy and light at this stage.
Sift dry ingredients: One of the most important steps in this recipe is to sift the dry ingredients together. Pick up a large sieve. If you bake often, it will come in handy!
Aerate the dry mix: A critical part of this preparation is to sift the flour mixture thoroughly. Use a large mesh strainer—especially useful if you bake frequently.
Shake the dry mixture directly into the combined yolk-and-white base. Use gentle folding motions to unify the batter, then spread it evenly inside a 12 × 17 inch rimmed sheet pan.
Bake briefly—approximately 13 to 14 minutes—since this produces an extremely thin sponge.
Flip immediately: Skip cooling in the pan. While warm, turn the sheet onto parchment paper or a light tea towel sprinkled with cocoa powder.
Shape while hot: Roll the sponge up loosely with the paper or cloth. Leave it at room temperature until cool, so that it “learns” the spiral form and won’t split later when filled.
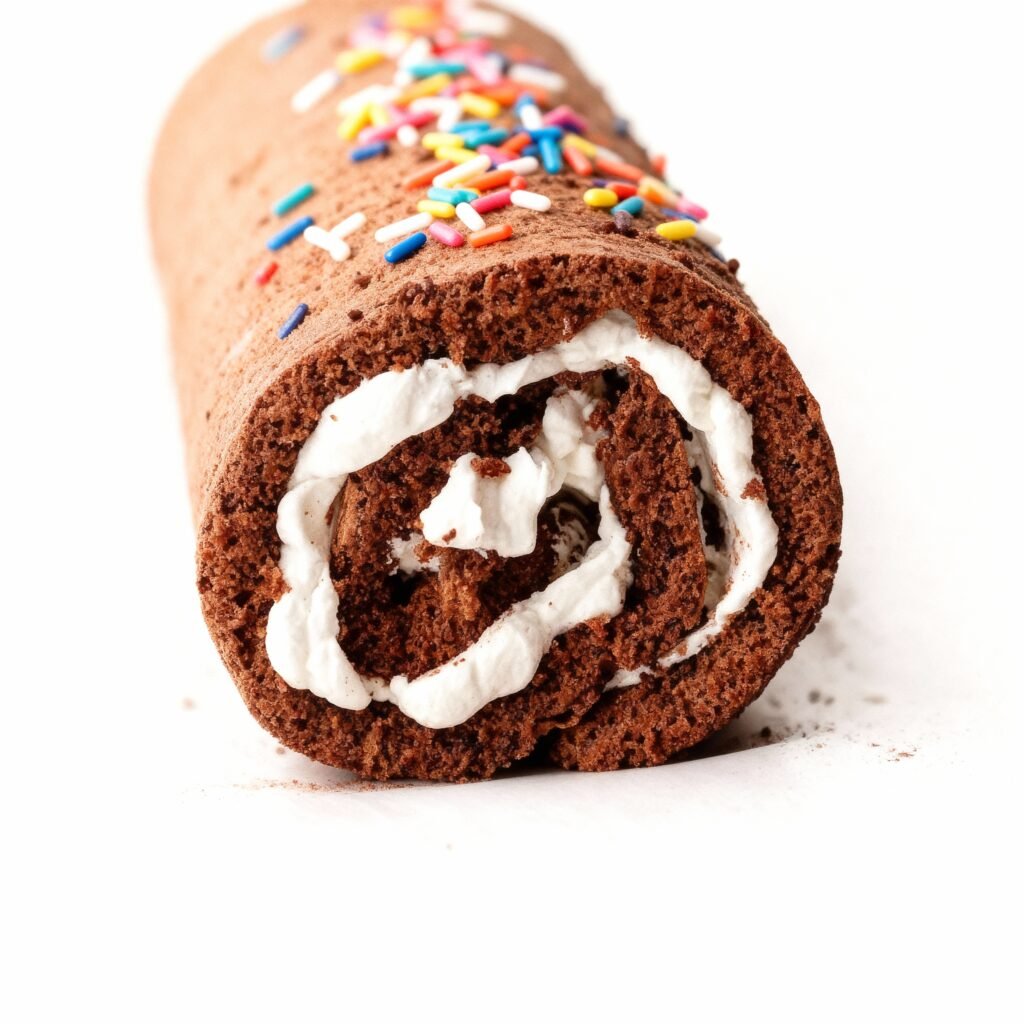
Final assembly: Once fully cooled, unroll, spread whipped cream filling across the surface, roll again (discarding the paper or towel), and finish by covering with a smooth layer of ganache.
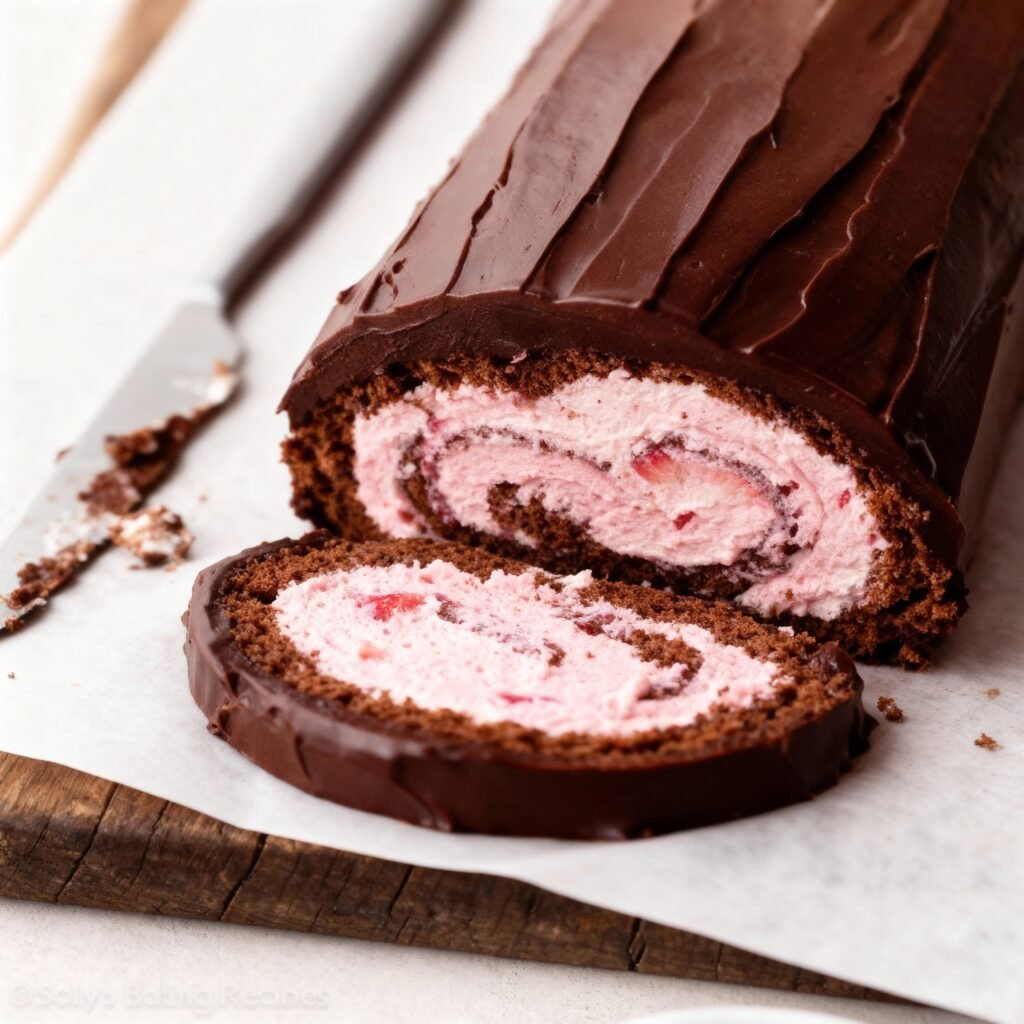
Rolled Sponge Dessert Center
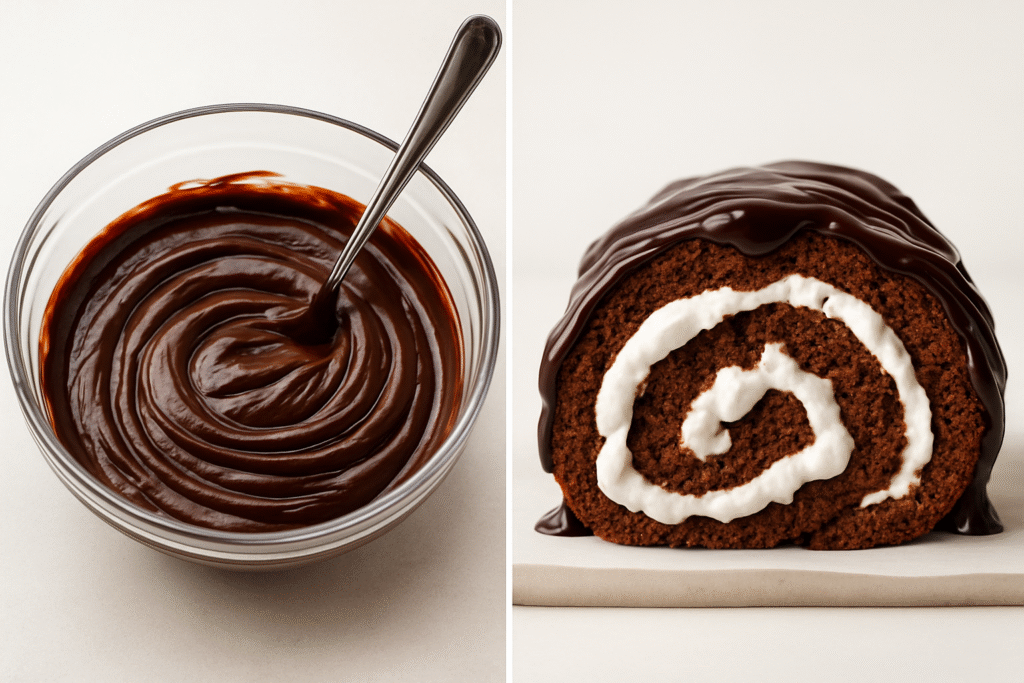
Inside the spiral sponge, the creamy layer is airy, smooth, and infused with sweet notes of vanilla—an elegant balance against the decadent chocolate glaze that goes over the exterior. Since the glaze is quite intense in flavor, I like to increase the sugar and vanilla slightly beyond my standard whipped cream formula. Either powdered sugar or regular white sugar works well here (see note in my directions). For extra richness, I often fold in a spoonful of marshmallow spread from the store, which adds a surprisingly irresistible taste. Everyone who sampled it was delighted!
Once the sponge is filled, roll it back up (discarding the baking paper), and leave it aside while you prepare the glossy chocolate topping.
If you’d like an alternative to whipped cream, a silky custard-style filling would be an excellent substitute.
Silky Cocoa Glaze
Making a shiny cocoa glaze is just about as effortless as whipping cream from scratch. All it takes is pouring hot cream over very small shards of quality chocolate and blending until it turns into a velvety mixture. For a touch of sheen, a drop of corn syrup can be stirred in, though it’s entirely optional.
Here are two key tricks for flawless results:
- Select proper chocolate. Go for baking bars from reputable brands like Ghirardelli or Baker’s rather than chocolate chips, which include additives that hinder smooth melting. A bittersweet variety around 60% cocoa is my personal pick.
- Cut the chocolate finely. The more delicate the fragments, the faster they dissolve, giving you a silkier texture and flavor.
Finally, refrigerate your cake roll after adding the glaze so it firms up, making clean slices easier (with plenty of finger-licking left over).

Tricks for Perfect Chocolate Swiss Roll
- Avoid breaks while rolling: It’s fairly common for sponge sheets to split during shaping, so don’t worry if it happens. Even professional versions sometimes tear, and you can simply patch the sponge together and hide flaws with filling or frosting. To reduce the chance of cracks, start shaping the roll while the cake is still slightly warm, and move gently rather than rushing. Let it rest on the counter until it cools naturally before you unroll and spread the filling. If the sponge is chilled when opened, it tends to snap.
- Choose the right pan: A rimmed tray around 12×17 inches works beautifully. A smaller option such as 10×15 inches can be used as well, but you’ll need to extend the bake time by roughly five minutes. The smaller pan yields a puffier sponge, while the larger tray creates a thinner, more flexible sheet. Personally, I like the thin version with a light cream center because it’s easier to roll without breaking.
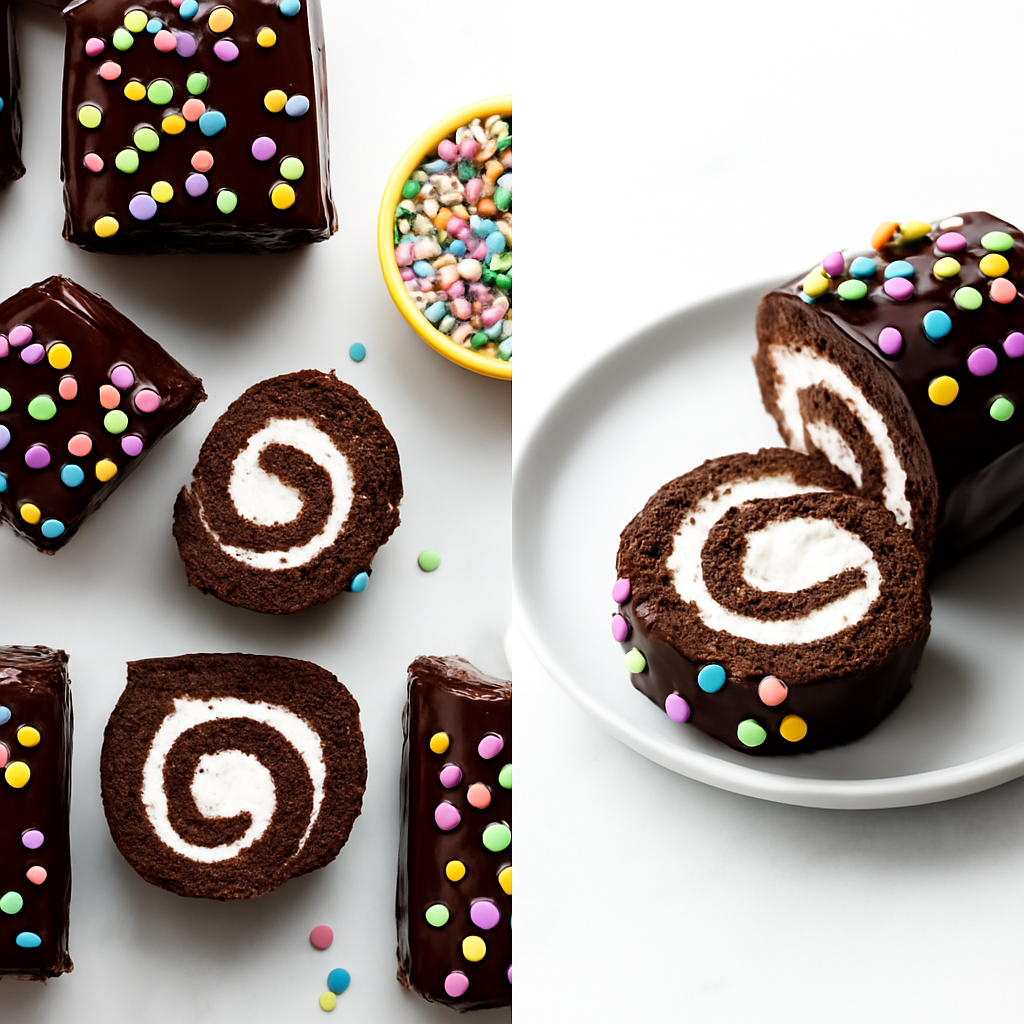
- Try snack-sized portions: For fun, you can cut the baked sponge into four rectangles and roll each one separately. Slice them in half once filled, and you’ll have eight little Swiss rolls resembling popular packaged treats.