I still remember the first time I unboxed my Cricut and felt a mix of excitement and mild panic. Small, shiny sheets of vinyl stacked beside a sleek cutting machine made everything feel possible and a little mysterious.
Beginner Friendly Cricut Vinyl Projects felt like the right label for the clumsy, happy experiments that followed.
Over cups of tea and too many test cuts, I learned that simple projects can teach more than a single complicated build. These Beginner Friendly Cricut Vinyl Projects became little wins that brightened shelves, jars, and notebooks around my home.
Personalized mug decals with glossy vinyl

I fell for the way a glossy decal turned an ordinary ceramic mug into a tiny, personal artifact. The vinyl catches morning light and makes handwarmth feel like part of the design.
I remember sitting with a mug in both hands, tracing a faint edge where vinyl met glaze, noticing how the contrast between matte paint and shiny decal made letters pop. There was a quiet joy in lining up typography, listening to a soft scraping sound as excess vinyl was lifted away, and later, sipping tea from something that felt made just for me.
Steps
- Measure mug curvature and design proportions in the design software.
- Load glossy permanent vinyl onto the cutting mat and send the design to the machine.
- Carefully peel away excess vinyl and lift the letters or motif with a weeding tool.
- Place transfer tape over the decal and smooth from center outward to remove air pockets.
- Align the decal on the mug, rub firmly, and slowly remove the transfer tape.
Laptop sticker collage for personality and flair

Sticking decals onto a laptop felt like giving it a new personality. Matte and metallic finishes layered together created playful contrast against cool aluminum.
I enjoyed arranging tiny stickers around a logo, stepping back to see how little scenes formed—a tiny cactus here, a handwritten quote there. The vinyl felt smooth to the touch, and corners stayed crisp after days of tapping keys.
It was oddly satisfying to watch a flat sheet become an eclectic collage that aged a little with scratches and coffee rings, telling a small story of commutes and late-night playlists.
Steps
- Design a set of small stickers with varied shapes and finishes in the software.
- Place sticker vinyl on the cutting mat and cut at the recommended blade settings.
- Weed away negative vinyl, leaving the sticker shapes on the backing.
- Use transfer tape to lift each sticker and position them on the laptop surface.
- Press each sticker firmly and remove the transfer tape slowly.
Name labels for water bottles and tumblers
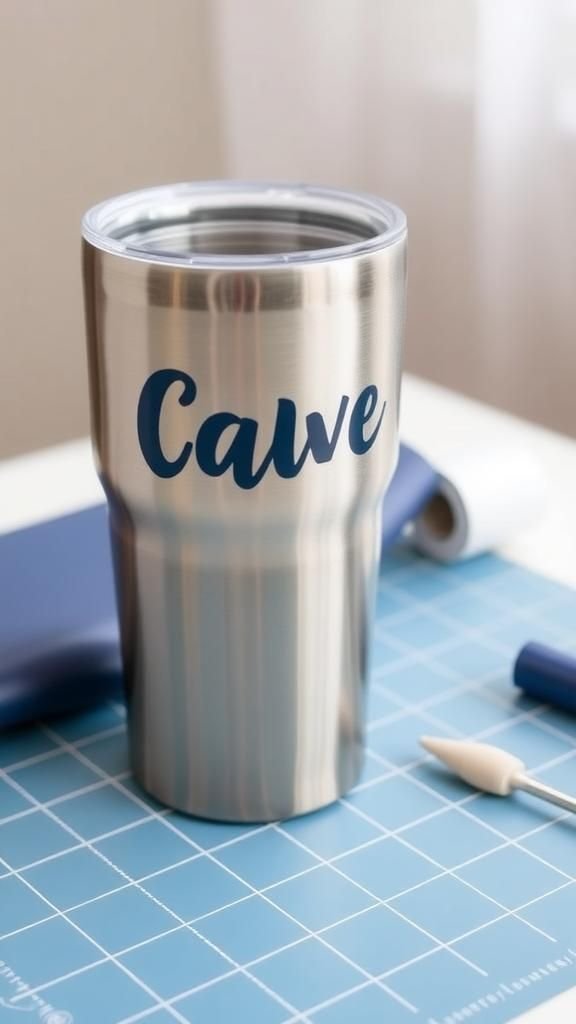
Custom name labels gave my tumbler a quiet confidence among many similar bottles. The thin vinyl letters felt durable, brushing against lips without roughness.
I remember testing different fonts and watching how rounded letters hugged curves more naturally than rigid, square types. Color choices mattered in tiny ways; a muted navy looked grown-up while a bright coral brought a playful energy.
The label’s edge stayed smooth after weeks in a bag, and occasional condensation only made the glossy colors shimmer a little more, like a small reward each time I reached for a drink.
Steps
- Measure the usable tumbler area and create a name design sized to fit.
- Load permanent vinyl onto the mat and cut with the appropriate settings.
- Weed excess vinyl and lift the name with transfer tape.
- Center the label on the tumbler and smooth it down firmly.
- Remove transfer tape, ensuring the edges of the vinyl remain adhered.
Monogrammed wine glasses that catch light

A tiny monogram on glass turned ordinary stemware into keepsakes for slow dinners. The vinyl sat almost invisibly until candlelight hit it, then letters outlined in soft glow.
I enjoyed the delicate balance between scale and script weight; a too-bold font overwhelmed a thin glass, while a fine script invited closer inspection. Handling the glasses felt intimate, like holding something made with attention.
The subtle vinyl texture was a whisper against fingers, and even after washing gently, the initials retained a tidy, restrained presence that quietly marked each glass as special.
Steps
- Choose a delicate font and size that fits a wine glass bowl.
- Cut permanent vinyl on the mat and carefully weed the tiny parts.
- Apply transfer tape over the monogram and smooth it gently.
- Position the monogram on the glass and press down evenly.
- Peel transfer tape away slowly, checking edges for secure adhesion.
Pantry jar labels for a curated kitchen shelf

Labeling pantry jars made a chaotic cabinet feel ordered and calm. Matte black labels contrasted with pale glass, while tiny handwritten fonts added a homey touch.
I liked how the smooth vinyl looked against textured metal lids, the sound of a label smoothing into place, and the quiet satisfaction of seeing rows of matching jars. There was a ritual to selecting fonts, matching ink tones to jar contents, and watching the kitchen shelf shift from mismatched chaos to a small, tidy display that made me want to open the door just to admire it.
Steps
- Measure jar fronts and design label shapes and names in the design software.
- Load matte vinyl onto the mat and cut at recommended settings.
- Weed the cut labels and place transfer tape on top.
- Align the label on the jar face and smooth it down firmly.
- Remove transfer tape and repeat for each jar until the set is complete.
Cozy throw pillow decal with subtle texture
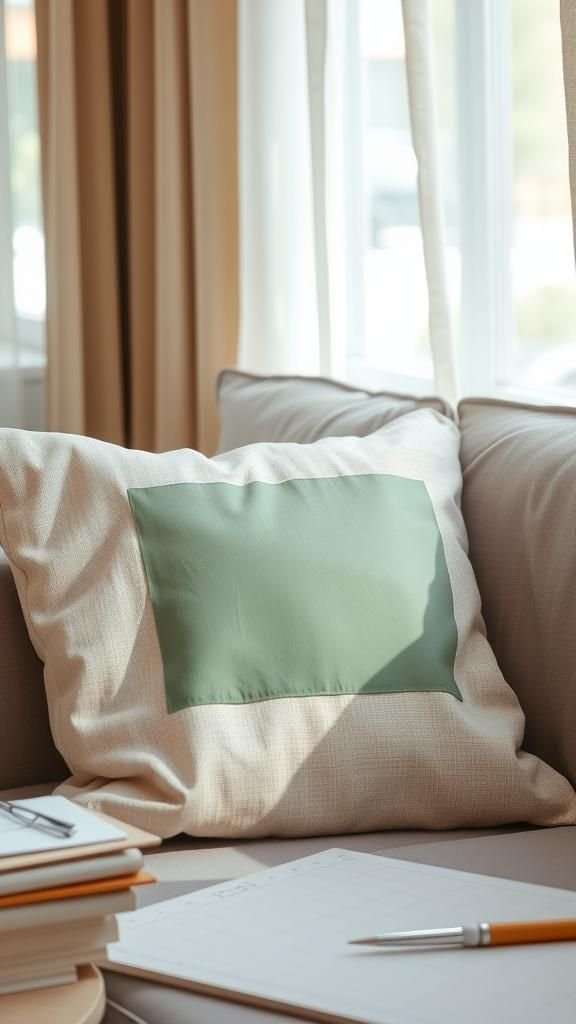
A simple vinyl decal breathed fresh life into a plain throw pillow, adding a graphic moment to the sofa. The matte vinyl settled into woven fabric and gave a faint tactile ridge that invited fingertips.
I remember running a hand across the design and smiling at how the soft cotton met the crisp edge of vinyl. Color choice changed the whole mood: a warm terracotta felt like autumn, while soft sage brought calm.
The pillow became a small statement, quietly anchoring the room without shouting, and guests often glanced twice at its neat lettering.
Steps
- Measure the pillow front and create a design sized to fit the fabric area.
- Cut heat transfer vinyl on the mat with appropriate blade settings.
- Weed the excess HTV and cover the design with heat-resistant transfer tape.
- Apply heat with a handheld press or iron following vinyl heat recommendations.
- Remove the transfer tape once cooled to reveal the crisp decal.
Simple wall quote decals for small spaces

A short quote on a narrow wall transformed a forgotten corner into a pause-worthy moment. The matte white letters sat against a pale wall and read like a soft reminder each time I passed.
I enjoyed testing layouts, watching how line breaks affected rhythm, and noticing how a small phrase could change the feel of a hallway. The vinyl’s thin edge caught a sliver of shadow at noon, and evening light made each letter seem to float.
It became a tiny ritual to glance up and read the phrase aloud when coffee needed encouragement.
Steps
- Choose a short quote and design the layout with appropriate spacing.
- Cut permanent matte vinyl on the mat and weed the letters carefully.
- Apply transfer tape over the quote and smooth from center outward.
- Position the quote on the wall and press down firmly for adhesion.
- Slowly remove the transfer tape, ensuring each letter remains in place.
Handwritten-style wooden plant markers in pots

Tiny wooden markers with vinyl labels turned my windowsill into a miniature garden map. The contrast of warm wood grain and crisp black lettering felt comforting, like a bookstore label on a tiny shelf.
I remember the faint scent of wood and the smoothness where vinyl hugged the marker’s curve. Some markers leaned charmingly after being pushed into soil, which only made the scene feel lived-in.
Guests leaned closer to read names, and the markers helped me talk to each plant during watering time, turning plant care into a small daily ritual.
Steps
- Design small rectangular labels sized to fit wooden plant markers.
- Cut permanent vinyl on the mat and weed the small lettering carefully.
- Apply transfer tape to lift each label from its backing.
- Place each label onto the wooden marker and smooth down for adhesion.
- Insert the labeled markers into potted soil gently.
Seasonal greeting cards with vinyl embellishments

Adding a small vinyl accent to a card made it feel intentionally crafted, not rushed. A metallic gold star against matte cardstock caught light in a way that ink alone never did.
I enjoyed mixing textures—soft paper, shiny vinyl, and the faint creak of a folded card—then sealing an envelope with a matching sticker. Each finished card felt like a tiny present, heavier in the hand and worth lingering over as it was addressed.
Friends commented on how tactile the cards felt, which made the extra quiet hours of crafting feel worthwhile.
Steps
- Create small vinyl motifs sized to complement standard card dimensions.
- Cut adhesive or metallic vinyl on a cutting mat with fine settings.
- Weed and apply transfer tape to the tiny embellishments.
- Place each vinyl accent onto the card front and smooth down gently.
- Remove transfer tape and add the card to a matching envelope.
Kids’ name wall art that feels playful

A bright vinyl name on a nursery wall felt like a friendly wave every time I entered the room. Rounded, bouncy letters and cheerful colors invited smiles, and the vinyl’s smooth surface looked almost like a sticker from a storybook.
I remember tracing the curves of each letter with a fingertip and imagining the child’s small fingers doing the same in years to come. The piece added a gentle focal point above a crib or shelf, and its cheerful presence seemed to encourage imagination and bedtime stories on slow evenings.
Steps
- Select playful fonts and size the name to fit the chosen wall area.
- Cut colored permanent vinyl on the mat and weed the individual letters.
- Arrange letters with transfer tape into the intended layout.
- Apply the name to the wall, smoothing each letter for adhesion.
- Remove transfer tape and step back to admire placement and balance.
Slim phone case vinyl overlay with color pop
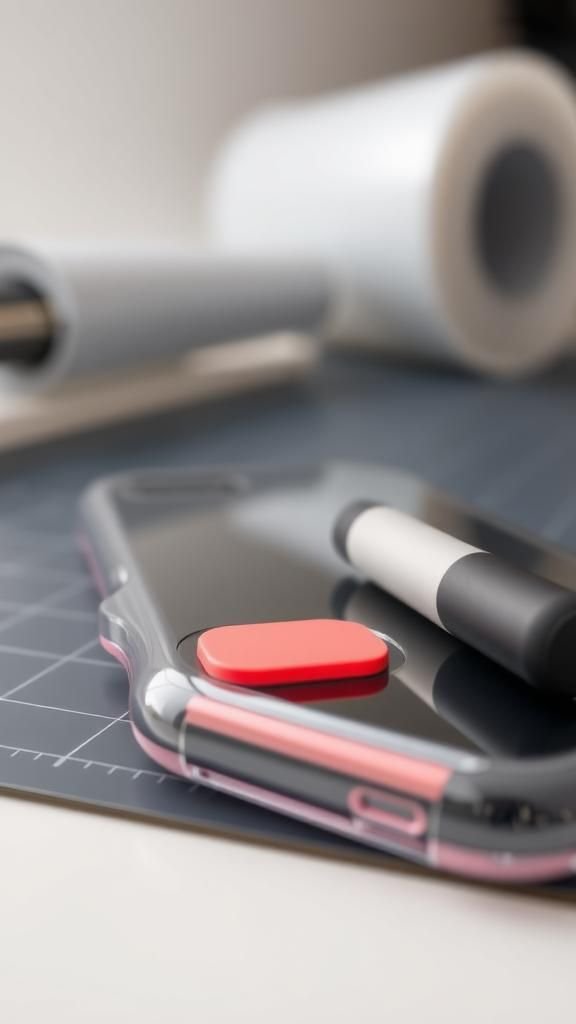
A slim vinyl overlay turned a plain phone case into something joyful to hold. The tactile contrast between smooth plastic and slightly raised vinyl made phone checks feel a little more pleasant.
I experimented with a small geometric patch of glossy color near the corner and liked how it balanced a daytime outfit. The overlay resisted pocket friction and kept its edge through jeans and keys.
Each time the phone lit up, the vinyl patch caught just enough light to feel intentional, reminding me that small touches can lift everyday routines.
Steps
- Trace the phone case shape and design an overlay that fits its contours.
- Cut thin permanent vinyl on the mat and weed away negative areas.
- Use transfer tape to lift the overlay and align it on the case surface.
- Press the vinyl down firmly to secure adhesion.
- Peel off transfer tape and check edges for a snug fit.
Reusable grocery bag design for everyday errands

A custom vinyl graphic on a reusable bag turned errands into a tiny style moment. The durable vinyl held up against rough handles and quick grocery runs, and the bright design made the bag easy to spot among others.
I liked the satisfying matte finish against canvas and the slight flex when heavy items shifted inside. People paused to compliment the illustration, and each trip felt a little lighter knowing the bag carried a personal touch.
Over time, faint scuffs added character, weaving daily life into the surface of the design.
Steps
- Size a graphic to fit the bag front and choose heat transfer vinyl for fabric.
- Cut the design on the mat with appropriate HTV settings.
- Weed the cut design and cover it with heat-resistant transfer tape.
- Apply heat evenly with a press or iron following HTV instructions.
- Peel the transfer tape after cooling to reveal the finished graphic.
Tiny keychain vinyl charm, sweet and durable

A tiny vinyl charm on a keyring felt like a pocket-sized talisman. The glossy surface reflected bus stop lights in a pleasing way, and the small scale made details feel precious.
I experimented with layered colors and loved how the edges created a neat outline when trimmed closely. The charm rode with me through pockets and bag linings, surviving tumbles without losing color.
Each jingled key felt a little more personal, and strangers sometimes asked about the little emblem, turning an ordinary moment into a brief, friendly exchange.
Steps
- Design a compact shape that fits keychain hardware and size it accordingly.
- Cut adhesive vinyl on the mat and weed the tiny elements carefully.
- Apply a backing or laminate for added durability if desired.
- Attach the vinyl piece to a sturdy keychain base and secure the ring.
- Test the charm by carrying it in a pocket to ensure durability.
Subtle car window decal for weekend drives

A small vinyl decal on the rear window made the car feel a little friendlier without shouting. The matte film resisted glare and settled into a corner like a quiet badge.
I liked how the decal softened with distance, becoming a gentle flourish rather than a billboard. During a sunset drive, the decal silhouette felt like a companion against the changing sky.
It survived washes and rain, retaining sharp edges, and each time I slotted the car into a crowded lot, the decal made it easier to spot and somehow made the vehicle feel more like mine.
Steps
- Design a decal sized for the chosen window area and mirror it if needed.
- Cut outdoor permanent vinyl on the mat and weed carefully.
- Apply transfer tape over the decal and smooth out any bubbles.
- Position the decal on the clean window and press down firmly.
- Remove transfer tape slowly while checking that edges adhere well.
Chalkboard label set for pantry and shelves

Vinyl chalkboard labels gave jars and bins a flexible identity that could be updated as needs shifted. The matte black surface welcomed a crisp white letter and erased cleanly for new contents.
I liked the ritual of wiping a label and writing a new name, the faint chalk dust that lingered like a memory, and the way matching shapes made shelves read as a neat set. The labels resisted spills and stayed anchored to glass and plastic, making the whole pantry feel curated without fuss.
It made grocery sorting feel calmer each week.
Steps
- Cut chalkboard-adhesive vinyl into uniform label shapes on the mat.
- Weed and apply transfer tape to each label for placement.
- Stick the labels to jars or bins and smooth out for firm adhesion.
- Let adhesive set briefly, then write with chalk marker and allow to dry.
- Erase and relabel as contents change.
Embellished candle jars with matte decals

A matte vinyl band around a candle jar made a simple object feel considered. The vinyl’s soft surface complemented glass and wax, creating a layered look that felt like a small boutique find.
I enjoyed pairing neutral hues with scented candles for evenings when mood mattered. The decal’s edge caught gentle lamplight and added a quiet contrast to flickering flames.
Over time, the decals remained snug even with occasional candle heat, and gifting a jar with a little label felt like offering a tiny, wrapped moment of calm to a friend.
Steps
- Measure the jar circumference and design a band or motif to fit.
- Cut permanent matte vinyl on the mat and remove excess material.
- Apply transfer tape and align the decal around the jar.
- Smooth the decal firmly, ensuring no bubbles remain.
- Peel transfer tape off carefully, checking adhesion near the edges.
Playful custom shoe decals for canvas sneakers
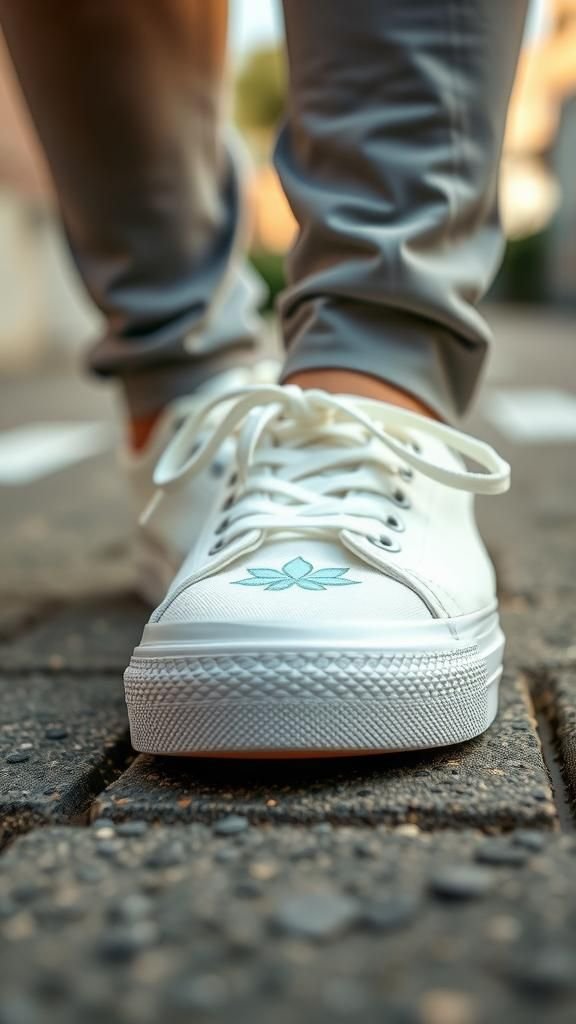
A tiny vinyl motif on canvas sneakers felt like a wink every time I laced them up. The vinyl adhered to fabric and flexed with each step, turning plain shoes into something a bit cheeky.
I remember choosing a mint accent that brightened scuffed toes and made rainy days feel less gray. The texture caught dust but cleaned up quickly, and the outline stayed crisp after weekend wandering.
Friends noticed the small detail and asked where it came from, which made me proud of the little customization that brought personality to something worn daily.
Steps
- Design a small motif sized for the shoe’s toe or side panel.
- Cut heat transfer vinyl suitable for fabric on the mat.
- Weed the design and position it on the canvas surface with transfer tape.
- Apply heat evenly with an iron or press following HTV guidance.
- Peel the transfer tape once cooled and check for secure adhesion.
Sparkling holiday ornament decals with metallic finish

Metallic vinyl on clear ornaments turned baubles into tiny heirlooms. The foil shimmer scattered tree lights into miniature constellations, and the smooth metallic surface felt cold and sleek when first handled.
I enjoyed layering small motifs and seeing how each reflection changed as the ornament rotated. Gift exchanges became a chance to share small handcrafted items that looked polished yet personal.
The decals held through seasonal storage and returned each year with a familiar gleam, reminding me of slow afternoons by the tree stringing lights and listening to an old playlist.
Steps
- Size metallic vinyl motifs for clear ornament surfaces and mirror designs if needed.
- Cut the vinyl on the mat with careful settings for foil materials.
- Weed the cut pieces and apply transfer tape to lift them.
- Place decals onto clean ornament surfaces and smooth for adhesion.
- Remove transfer tape and let ornaments rest before hanging.
Easy HTV tote with layered graphic design

Layered heat transfer vinyl on a tote introduced a sense of crafted polish to errands. Layers added depth, with soft matte base colors and a glossy accent popping above.
I loved the faint warmth after applying heat and the satisfying snap when the design cooled. The tote felt heavy in a reassuring way, the graphic remaining crisp after groceries and commutes.
Watching a flat design become a tactile, slightly embossed image on fabric felt rewarding, and each outing with the tote made the small design feel companionable rather than decorative-only.
Steps
- Create a multi-layered design and separate each color into its own cut layer.
- Cut each HTV color on the mat and weed individual layers.
- Stack layers with transfer tape and align them on the tote fabric.
- Apply heat evenly following HTV temperature and timing guidelines for each layer.
- Peel transfer tape after cooling and check for full adhesion.
Bright party favor stickers for any celebration

A sheet of small vinyl stickers brightened favor bags and added a cohesive touch to gatherings. The glossy shapes reflected party lights and felt cheerful in little clusters on brown paper bags.
I enjoyed matching colors to a theme and watching how kids’ eyes lit up when handed a carefully sealed favor. Stickers survived transit in boxes and resisted smudging, remaining gleaming little emblems of the day.
Packing them into neat stacks felt like prep for a tiny ritual—guests walked away with a small, tangible memory attached to a fun morning or evening.
Steps
- Design a sheet of small sticker motifs arranged for efficient cutting.
- Cut sticker vinyl on a cutting mat with die settings if needed.
- Weed and separate the stickers into sheets or individual pieces.
- Apply stickers to favor bags or packaging and press firmly.
- Store leftover sheets flat to keep stickers pristine until needed.
DIY sticker sheet to keep and trade

Making a full sticker sheet felt like creating a tiny gallery to carry in a sketchbook. Small vinyl illustrations held up to handling and traded with friends, each piece smooth to the touch and resilient to spills.
I liked arranging complementary shapes so they read as a little scene at first glance and then as individual stickers on closer look. There was a delight in sharing a handpicked selection with a friend across a coffee table, swapping stickers like postcards, and feeling connected through those tiny, tactile tokens that fit in a pocket.
Steps
- Arrange multiple small illustrations into a grid for a sticker sheet layout.
- Cut printable or sticker vinyl on the mat and remove unwanted sections.
- Weed around each sticker and, if needed, laminate the sheet for durability.
- Cut the sheet into manageable sizes and separate stickers as desired.
- Store the sheet flat or divide stickers for trading and gifting.